Friday, June 2, 2017

Engine Fire in the Baja Bug

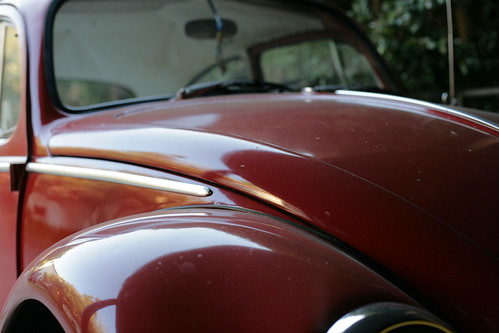
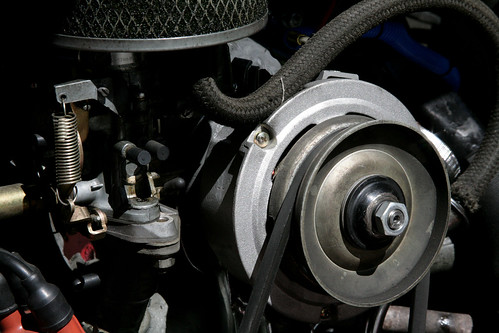
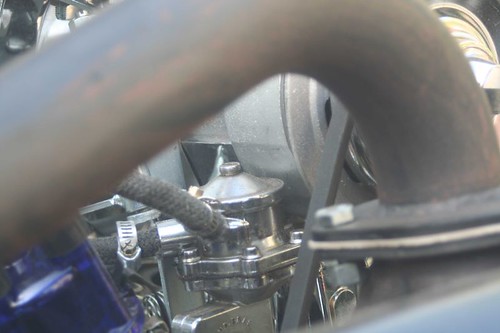
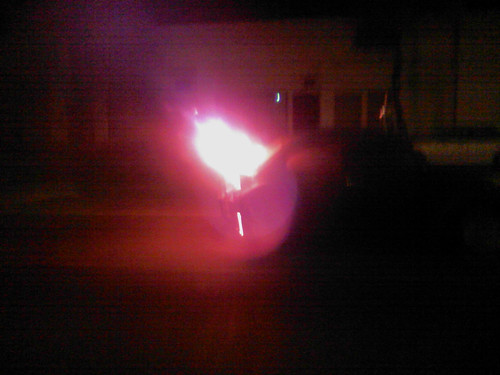
Baja Bug On Fire In the early days of 2016, I was experiencing some fuel leaks on my Baja bug. Some of the rubber hoses that I had installed when I first put the thing together had gotten brittle and subsequently had cracked from the vibration of the engine and the rough city streets of Los Angeles. I could smell the gasoline inside the car, but that car always smells of gasoline. Like all air-cooled VWs, the gas tank is in the front and if the gas cap doesn’t seal perfectly or the gasoline splashes around in the tank and spills out of the vent, you smell gasoline in the car. I check it out and notice that the fuel lines were showing some deterioration, especially on the end where the line hooked to the carburetor. The hose seemed okay except for the end, so I just cut off that bit and hooked it back up. Big mistake. The next evening, as I was driving home from Hollywood, the engine died. I pushed in the clutch and kept rolling forward as I turned the key to try to restart the engine. Someone behind me honked their horn. I looked in the rearview mirror to see what was going on. What I saw were flames coming from the engine compartment of the car. By then the car had stopped rolling forward. I pulled the handbrake, shut off the ignition, unfastened my seatbelt and got out of the car to see what was burning. The fuel line had failed and the gasoline was burning up the top of the motor. There were several people gathered on the nearby sidewalk. Some of them told me to get away. I didn’t. Instead I opened the passenger door and removed my laptop and other gear from inside the car. I then retreated to the curb and was prepared to dial 911. Someone said that they had already done that and that the fire department was on the way. Since I had failed to carry a fire extinguisher in the car, there was nothing else for me to do at that point but stand with the other spectators and watch it burn. As the wires burned, the starter engaged a number of times. I realized now that I should have disconnected the battery while I was getting my stuff out of the car. The burning gasoline set the fiberglass spoiler on the back of the car on fire. While I stood on the sidewalk with my laptop computer and my lunch pail and watched it burn, I called my wife to let her know that I would be late getting home. About the time that the fire was really getting serious, the fire truck pulled up. I told my wife I’d call her back when the fire was out. While one of the firefighters sprayed water on the engine fire, another disconnected the battery and ripped the carpet off of the firewall at the rear of the car. The guy tearing out the carpet said it was necessary as the carpet was melting and charring and could burst into flames. Nearly everything got wet before they were done, including the seats, which I discovered a few minutes later when I got into the car to steer it as it was pushed out of the street and into an adjacent parking lot. As I stood there next the car deciding what to do next, a tow truck pulled into the lot. The tow truck driver and what I believe was his wife offered to tow the car to my house for me. It seemed like a good idea, since I didn’t know how else I would get it home, so I told them to go ahead. They backed up, got the front wheels hooked up to their tow rig and placed a magnetic light bar on the top. When they raised it up, though, fuel started leaking from the fuel line again and was running into the parking lot. I cut off a piece of burned wire, crimped the end of the rubber tube and tied it closed, stopping the fuel leak. The driver now wanted his money for the tow, but he would only take cash. I don’t remember how much he asked for but it seemed like way too much for towing the car just a couple of miles. I told him I’d figure out some other way to get it home and had him unhook his gear. He did, but he left the magnetic light bar on the top of my car. I called my wife again, to let her know that the fire was out and to have her bring a tow chain to we could drag the thing home. She reminded me that we had bought her an AAA membership which we could use to get the car towed home. I had her call AAA and arrange it and then drive over so that she would be present when the AAA driver showed up since she’s the membership holder and not I. While I waited for my wife and/or the tow truck to arrive, I retrieved all the wet carpet and other scorched car parts from the street where the firefighters has put them and loaded them into the car. I figured I might need some of them later. As I was doing that, I noticed the abandoned magnetic light bar still attached to the top of the car. I didn’t want it, so I took it off the car and set it on the pavement next to the car. It lay there blinking. I figured if the tow truck driver from earlier missed it, he could pick it up where I had left it. He never came back. Eventually, a homeless guy took the still brightly shining light bar and added it to the pile of stuff in the shopping cart he was pushing. My wife showed up and soon thereafter, the tow truck she had requested showed up as well. We had them drop the car in my driveway. I rolled it down the drive and backed in into a parking spot near the back door. I left it there for quite a while before I got around to inspecting it to see what the extent of the damage was. It wasn’t as bad as it appeared that night, but I’ll save that story for the next episode. Lessons learned: Always carry a fire extinguisher in the car. Be more diligent in inspecting the condition of the fuel lines. Use metal fuel lines as much as possible. Route the fuel lines so that if they do leak, they don’t drip onto the distributor where sparks can set the gasoline on fire.

Monday, June 22, 2015

Maintaining the Fleet

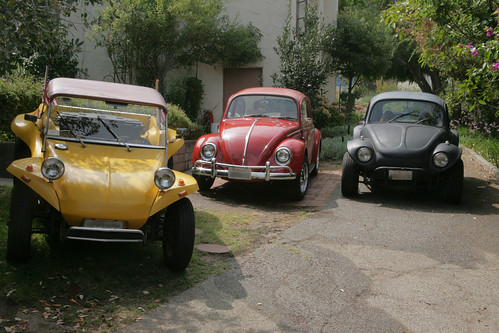
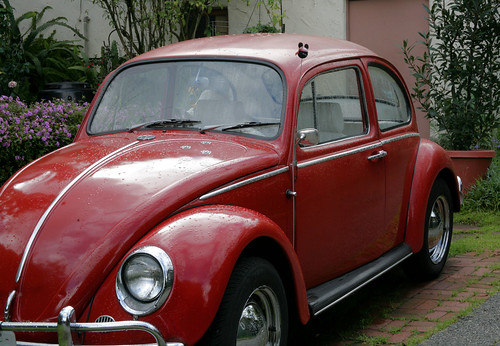
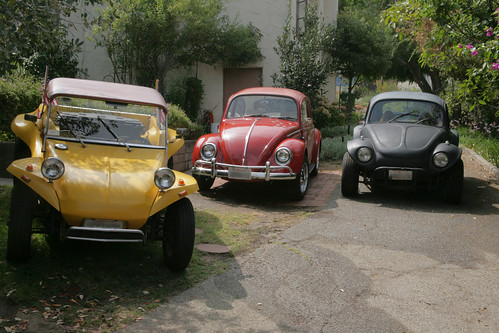
The Fleet I’m commuting again and that means constant maintenance of the old air-cooled cars. I was driving the ’67 Baja bug for a while until the clutch started making noise. It was a squeaking sound as if the release bearing was worn out, except that the noise was intermittent and/or dependent upon how far I had the clutch pedal depressed. I took the car out of service and started driving the ’65 stock Beetle. The ’65 Bettle runs great now that I’ve replaced nearly every moving part. The problem with that one is that I’m running the stock tires all around and so it’s top speed, with stock gearing, is around 60 mph. Any faster than that and I feel like the engine is turning too fast, like it’s reaching the maximum rpms that I want to run it at. I recently realized (duh) that, because I run stock tires on the rear of this car, the rpms top out at a lower speed than my other cars where I run oversized rear tires. Big tires equals going faster with less rpms, but it also means less power at the rear wheels for the cars with the big tires. So the ’65 with its stock tires is very zippy around town and kind of slow on the highway. That’s okay, though, since I run a smaller engine in it, the smaller tires work well with the smaller engine. The other cars have bigger engines and can handle the big tires. So, I got the dune buggy out of the garage and started driving it. There were some minor oil leak issues that I had to resolve, but with those handled, it works well for the commute. I did destroy a tire on one of my trips home, though. When I put it away late last fall, I had been running the tires at very low air pressure. This works great on the off-road trail at low speeds, but it’s not so good for the highway, so I added a few pounds to each tire. As it turned out, one of the valve stems had a slow leak. I made it out to the other side of town just fine. The car is so light that, when I got back in it to come home, I didn’t notice that one of the Goodrich T/As was nearly flat. I noticed some weird vibration while I was driving, but it just didn’t feel like a flat tire. I was thinking that the problem was more in the front suspension which is original ’57 link and king pin. I was wrong. I made it home, but the tire was ruined. An expensive mistake. When I went to find a replacement tire, I discovered that Goodrich has started making those classic All-terrain T/As in a slightly new style. Not a big problem, but the rear tires are mismatched now. Runs down the road very well, though, and since it’s not a show car, I don’t mind that one rear tire is slightly different that the other. Someone will probably mention it when we take the car up to Big Bear Lake in July, but other than car guys, who looks closely at tires? At this point, I had two cars able to handle the commute, but needed to get the Baja bug back on the road. I ordered clutch parts – pressure plate, clutch disk, release bearing, new cable – from one source. I ordered an improved version of the clutch hook-shaft from Unique Parts. I already have one of these things on the ’65 Beetle and it is a worthwhile improvement to the VW clutch system. I decided that since I was overhauling the clutch, I may as well go all the way and just replace everything. I heard from the Unique Parts guy and he was in the process of moving, so his part couldn’t be shipped right away. I told him not to worry about it, that I’d just do the cable, hook-shaft overhaul as a separate job, and to ship it when he could. When the clutch parts came, I waited until Friday afternoon to begin the overhaul, that way, if things got complicated as they sometimes do, I’d have all day Saturday to finish the job. This was the easiest clutch job I’ve ever done. The hardest part was getting the rear bumper cage off the car. That was only complicated because I’ve got the license plate light, a back-up light and the stop/running lights mounted on it. I had to get all those things out of the way before I could pull the bumper. After that it was easy. With nothing behind the engine, removing it is a simple matter of disconnecting the throttle cable, the fuel line, and three wires. After that I just put the jack under it, removed the four bolts that attached it to the trans-axle and out it came. The clutch disk and pressure plate looked fine. I replaced them anyway. The release bearing was a bit loose and had some little rust colored marks around the outside edge. I replaced that, too. That’s all there was to it. I jacked the engine back up, pushed it back onto the trans-axle, tightened up the bolts and it was done. But that time it was getting dark so I knocked off for the day. Saturday, I replaced the fuel line from the back of the body to the fuel pump since it was showing some wear. I put the bumper back on, re-attached all the lights and I now had the entire fleet up and running again. There was one other little thing that I did with the ’65 Beetle. The turn signal flasher has not worked right since I bought the car and I was never happy with the brightness of the bulbs in the front signals. I replaced the flasher with a new electronic one and replaced the old stock bulbs with super-bright LED bulbs. I feel better about those turn signals now. Unlike many drivers in Los Angeles, I actually try to use my turn signals to let people know what I am about to do. I think it helps them and I believe it makes me less likely to get hit by someone who is assuming I’m going to do something other than what I am doing, if you know what I mean. I like working on my cars. I like having three of them, so that I can work on them at my leisure and take my time to get things right. It’s rare that all three are broken at the same time, which means that I can usually get where I need to go when I want to go there. I like the idea that “car trouble” means having to decide which one to drive that day.

Thursday, October 17, 2013

Bad Manners = Bad Drivers

Homeward Bad manners equal bad drivers. The phenomenon of bad driving can’t be explained with that simple equation, but lack of courtesy is certainly one of the factors that contribute to making driving a car so frustrating and, often, infuriating. Scope of awareness is another factor. The scope of human awareness ranges from none, through only aware of oneself, to awareness of oneself and his/her family, to awareness of other people around us, and on up to complete awareness of our surrounding environment on all levels. There are some drivers who are very close to the bottom of that range, acting as if they are the only one on the road. Distraction is becoming more and more a major factor, not only behind the wheel of the car, but in many other areas of human interaction. As more people seek information and communication through hand-held electronic devices, distraction is increasingly creating chaos on the roads and on the sidewalks. Distraction effects awareness. The less aware one is, the more dangerous they are behind the wheel of a automobile. Distraction, in addition to electronic communication devices, can come from anything one is doing in addition to driving the car. When you are driving, that is all you should be doing. You have only fractions of a second to react to an almost infinite variety of hazards you may encounter. Undistracted, full awareness of the task at hand is what you should strive for when you drive. You are surrounded by discourteous, barely aware, distracted drivers. To survive you need ever advantage you can give yourself. In addition, there are some unwritten rules of the road, which you should know. Some of the rules are, or have been, practiced in other places. Some may well be unique to Southern California where I travel. Before I was old enough to drive, I heard about the St. Louis rolling stop. I had an aunt who lived in St. Louis and on a visit to her from our home in Peoria, Illinois, I remember hearing my parents discuss the rolling stop. They believed that it was unique to that city. Perhaps it was in the early 60s, but I doubt it. In California the rolling stop is alive and well, and the rule, as practiced, is that if there is no traffic, vehicle or pedestrian, at an intersection regulated by stop signs, you don’t need to stop. Or even slow down very much. Some drivers who get into the habit of applying this rule will often practice it even when there is traffic in the intersection. It is my firm belief that these drivers consider what they are doing and where they are going to be more important that anything anyone else might be doing and are thus entitled to the right-of-way, either that or they are just oblivious to everyone else on the planet. Recently, a new rule has come into fashion. Simply stated, it is: You may park anywhere you want to if you turn on your emergency flashers. Anywhere really does mean anywhere. I’ve seen this rule applied to double parking on a very narrow and quite busy street. It, apparently, applies to any situation where it might be even momentarily inconvenient for the driver to properly park his/her car. The way this works in practice is as follows. If you feel you need to get out of your car for some reason and there isn’t anywhere right where you are to get your vehicle out of street then you simply activate your emergency flashers and go about your business. How to get around the traffic hazard you just created is not your problem and you don’t need to be concerned about it. I believe that some drivers actually feel that they are entitled to stop their vehicle wherever they please as long as they turn on their emergency flashers, and if you object by honking or gesturing rudely they look either surprised or indignant that you would challenge their right to do so. Another rule: Turn signals are optional, or possibly obsolete. I’ve seen this rule applied in other places, but it is very broadly followed in Los Angeles, especially by the Los Angeles Police Department. In practice, this rule may be caused by one of the driver’s hands being required to steer the car while the remaining hand does various other tasks, such as texting; holding the cell phone to the ear; applying make-up; gesturing; holding a book, newspaper, coffee cup, sandwich, energy drink, cigarette or hairbrush; adjusting the sound system or on-board video player; and/or whatever other activity the driver might consider essential. In the case of the LAPD, perhaps they just don’t want anyone to know what they are going to do next. Of course there are always those people who don’t actually know what they are going to do next and, thus, all turns are done as an impulsive or entirely random act. Here is one to watch out for. The rule seems to be: When turning from a side street into traffic, always wait until you can see the oncoming driver’s eye color before pulling out in front of him. I see this every day. Just when you think that the driver who wants to pull out will wait until you have passed safely by, they pull out in front of you. They look at you and then they wait and wait. It’s as if they wanted to test your reaction time. Perhaps they do. This is a rule for the pedestrians in the group: If a driver pretends not to see the pedestrian, he doesn’t have to stop. Here is how this works. You are standing on the corner waiting for the light to change. There are cars waiting to turn onto the street you want to cross. When the light changes, cars can turn in front of you as long as the drivers have not made eye contact with you or you have not stepped off of the curb. Even stepping off the curb into the crosswalk is no guarantee that a car or two won’t clip your toes before someone admits to seeing you. Eye contact is essential for a pedestrian. Glaring eye contact is even better. If you can simulate a good, intimidating, “You better not!!” glare, you will be more likely to live to step up onto the opposite curb. This may well be my favorite. If, as you reach an intersection, not matter how busy it might be, and realize that you are in the left lane, but need to turn right, other drivers are required to yield to you as you cut across all lanes to make your turn. There is a related rule to this one, and that is: If you are pulling out of a gas station or restaurant driveway that is within a dozen feet of an intersection and need to turn left, you are entitled to cut across all lanes of traffic in order to make your turn. I believe the simple computation for this rule is that you should never have to live with a mistake where you would be required to turn around and try again. And finally, the most annoying rule of all: When turning around, always chose the narrowest part of the busiest street possible so that the maximum amount of cars are required to wait while you perform your maneuver. It is even better if one of more of the other vehicles have to back up to allow space for the completion of your turn. Never pull into a driveway and wait for traffic to clear when you need to turn around. Always strive for maximum inconvenience for the maximum number of other drivers. For the courteous, aware and undistracted drivers, I recommend that you always allow extra time to reach your destination. Driving is fun. Sit back and wait until the chaos resolves and then proceed with caution. Defensive driving isn’t just a catchy phrase thought up by the highway safety bureaucrats. No, it’s a lifestyle, an attitude. The Boy Scouts have it right with their motto: Be Prepared. Arm yourself with the knowledge that everyone out there on the road is crazy except you. If you drive that way, you’ll be more likely to survive your journey unscathed.

Friday, July 19, 2013

My Summer Vacation 2013

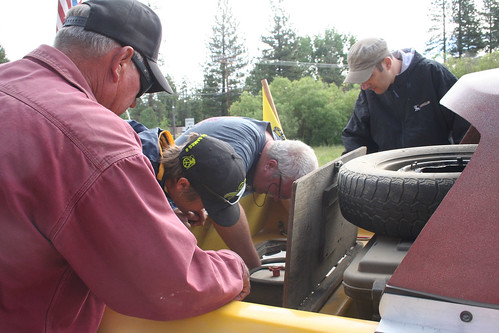
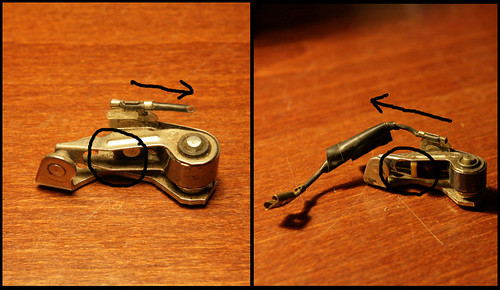
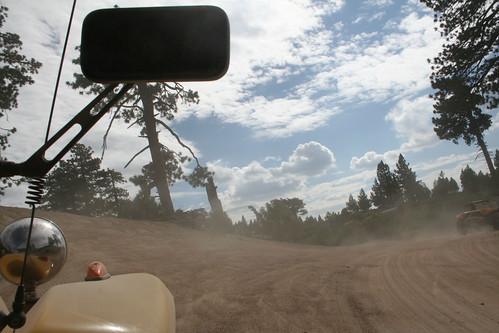
A Man and His Car This year, as we have for the past 12 years, Carol and I loaded up the dune buggy with all our camping gear and made the drive to Big Bear Lake for the annual Manx Club Big Bear Bash. This year was a record-setting rally for the club with 166 buggies in attendance. There were five groups of cars that went off-road and one group that stayed on the street. The weather was perfect and there was only one car that I know of that had to be towed back from our off-road adventures. As I said, this was our 13th year in a row at the Big Bear rally and up until this year we'd only had one minor mechanical problem. And that one minor problem was when our muffler fell off at the beginning of a Saturday run several years ago. That was no big deal, since all I did was stop, run back and grab the hot muffler, throw it into the car and we were back on the road again. This year was different. This year, our Saturday run was flawless. We had a great day of bumping around the back roads, driving along through the dust and through the forests and up into some really spectacular views. On Sunday when we set out we were in the middle of the pack of 40 some cars for a quick run up into the mountains and then back to camp. Just as we left the highway and were headed to the dirt, my car just stopped running. I coasted through the turn and off into a convenient wide shoulder along the road. As we sat there, most of the cars behind us in the pack went on by us and up the road towards the mountains. Due to the abruptness of the failure, I guessed that some part of the engine electrical system had failed. There was no way to tell exactly what had broken, fallen off, or whatever without looking, so I climbed out of the seat and walked around to the back of the car to see if I could figure it out. I opened the little hatch that gives me access to the engine and looked inside -- there was nothing obviously missing or loose on the engine. Maybe something had failed due to dust or corrosion. I re-seated all the wires that run the engine and tried to start the car. Nothing. Okay, no loose wires, dashboard lights are all working, it's got to be something inside the distributor. I popped the distributor cap and there it was. The ignition points had broken somehow. Repairs By now, a couple of the cars behind us had stopped to see if they could help. I had started to unscrew the hold-down screw for the points with the multi-tool I always carry on my belt when someone put a real screwdriver into my hand. I looked up and said, "Thanks," and continued working. When I got the point set out of the distributor the problem was easy to see. The tiny, fiber cam-follower has broken off -- first time that ever happened to me. I had a spare set of points in the tool kit I carry in the car, so I dug them out. When I tried to fit them into place, I discovered that, though the spare point set would fit and function, the wire that connected them to the condenser was attached going the wrong direction and wouldn't reach the connection in this distributor. No problem. I cut the wire on the broken set off right at where it was attached to the point set. Then I cut the wire on the spare set at right at the connector. I used my teeth to strip some insulation off each of the wires, twisted the two ends together and wrapped the connection with tape. Now I had a working set of replacement points. It was just a matter of re-installing them into the distributor. Points Easier said than done. Working on a VW distributor is best done with it out of the car and on your work bench. It's easy that way. Working on it in the car is a entirely different level of difficulty. After trying a number of different methods of getting the point set and it's tiny screw into the distributor lined up in such a way that they could be attached correctly, I finally managed to get it done (you have to stand on one foot and tilt your head, hold your mouth a certain way and you can do it). I set the point gap visually, tightened down the screw and walked around to the front of the car. When I turned the key, the engine started right up and idled nicely. I closed up the hatch, re-positioned the spare tire and strapped it down. I climbed back into the car and we were off to catch up to the rest of the group and continue our morning adventure. On the Trail I later apologized to the group for making them wait. What I didn't say was that I thought I did a pretty good job of getting my car back on the road quickly. Doesn't matter. The folks who stopped to help knew how well the repairs went. More importantly, the car got fixed so I could load my camping gear back on it and go home without the expensive aid of a tow truck. In my view, it was another perfect year, our thirteenth consecutive Big Bear Bash. What is life but a series of problems and their solutions? Without an obstacle now and then, life would be rather boring, wouldn't it?

Tuesday, June 11, 2013

The Little Red Car Motors On

LR In our last episode, we left the little red car sitting in the driveway airing itself out after the carburetor needle valve had failed and allowed the engine to fill up with raw gasoline. I called ahead to my BCE, the VW parts store that I’ve been patronizing for the last 29 years, to make sure they had the parts I needed. They did. I drove one of my other cars up there to pick them up. On the way back, I stopped at big chain parts store and picked up three quarts of oil. With the needed parts in hand, the problem was easily fixed. I threaded the spark plugs back into the cylinder heads, replaced the crankcase drain plug, and dumped in the three quarts of oil. To replace the needle and seat and the float was simply an matter of removing the four screws that hold the top of the carburetor in place and lifting it off. I removed the defective needle and seat and replace it with the new set. For good measure, I also replaced the float. I put the top back on the carburetor, screwed it down and climbed into the driver’s seat. I turned the ignition on with the key and let the electric fuel pump run for a minute to fill up the carburetor float chamber. When I engaged the starter, the engine fired right up and ran just fine except that it wouldn’t idle. That was an easy problem to figure out. The bad needle valve had been letting fuel into the carburetor all the time and thus was affecting the idle speed. Without that excess fuel, I needed to readjust the idle screws so that the engine was getting the correct amount of fuel to idle. Once that adjustment was done, the car ran beautifully and has been working fine ever since. For the future, to prevent this from happening again, I am going to install a fuel shut-off valve in the engine compartment so that, if I ever have to park the car nose-up on a hill, I can shut off the fuel. Every motorcycle I have ever owned had a fuel shut-off valve. In solving this problem, I realized why. On a motor cycle, the fuel tank is above the engine and, thus, the fuel can easily fill up the engine if there is a leak. This is only a problem on carbureted engines. Fuel injected engines have other potential problems, but flooding due to bad carburetor needle valves isn’t one of them. Another lesson learned. Another problem solved. The moral of this story is: If it has moving parts, eventually one or all of them will wear out and fail.

Sunday, May 26, 2013

The Curse of the Little Red Car

Airing Out the Engine
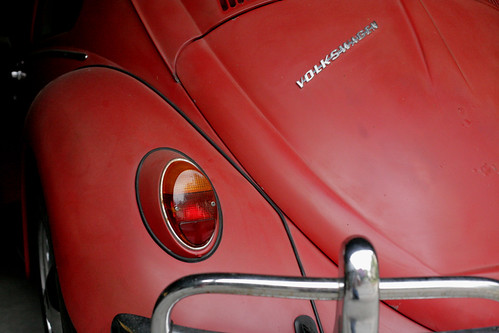
Once again, my ’65 VW Beetle has developed a problem.

I’ve been having some sewer pipe work done at my house which has made the driveway inaccessible. I needed to move a car out of the driveway just in case I needed one. With three cars to choose from, I figured that the ’65 Beetle with its locking engine compartment would be the hardest to steal. I moved it out into the neighbor’s driveway where it was only occasionally blocked by all the construction equipment. I used it a couple of times during the week and it ran and drove just fine.

On Friday, my neighbor needed to get his own car out of his driveway, so I moved the Beetle out onto the street. We live on a rather steep hill. Since the gas tank was full, I parked the car nose uphill in the morning so the gas wouldn’t leak out of the tank. In the afternoon of that same day, I went out to start it up and head off to a meeting. I turned the key in the ignition and only got a “click.” I thought, “Okay, the battery has gone dead. I’ll deal with that after I get back home.” I fired up the dune buggy and backed out of the driveway over the top of the wooden and metal covers on the three holes where the repair guys had been working earlier in the day. That was fine and I made it to my appointment only a few minutes late.

When I returned home, I went out to Beetle to see if I could figure out exactly what was wrong with it. When I tried to start it, I still only got this “click.” It sounded very similar to the sound I’d heard before when the battery didn’t have enough charge left to turn the starter. It wasn’t exactly the same sound though and the dashboard lights didn’t really indicate to me that the battery was dead. Still, I gave it the benefit of the doubt and took the battery out and put in on the charger in the basement.

A few hours later, the battery was showing that it now had a fair amount of charge available. Certainly enough to get the car started so that I could move it off the street. I put the battery back into the car and hooked it up. Still just a “click.” Okay, maybe something is locked up and I can bump the engine by popping the clutch with the transaxle in reverse and get it turning. I let it roll back a bit and engaged the clutch. Wham! A dead stop. I tried it again. Same result. Okay, the engine won’t turn over at all. The problem was now increased in magnitude from the simple dead battery to a possible seized engine. I still need to get it off of the street, though I was beginning to be less concerned about someone stealing it. In fact, I had momentary thoughts of encouraging someone to take it away and put me out of its misery. Instead, I let it roll down the hill and got it partly into the driveway. With our driveway, first you have to go up the driveway before you can go down. With the help of some very kind passers-by, we got it into the driveway and down to where it wasn’t going to be in the way. I left it there for the night.

The next morning, when I went out to see what was wrong, I had the benefit of several hours of pushing all the evidence around in my mind. As I approached the car I could smell a strong odor of raw gasoline. With the fact that it had started and run just fine when I backed it out onto the street and parked it; and the fact that the starter couldn’t make the engine turn; plus the fact that bumping the engine by popping the clutch hadn’t worked; I suspected that the engine was filled with gasoline – all of the engine including the manifold, the cylinders and the crankcase. I opened up the engine compartment and, indeed, there was gasoline dripping out of the bottom of the carburetor. It was full of gasoline all the way up the bottom of the carburetor. I didn’t have time to do anything about it at that point so I just moved it farther down the driveway where it would sit more level and left it there.

Today, after the car sat for a day in a level spot, there was no more gasoline dripping out of the bottom of the carburetor. So, on the level, there was no more fuel running into the engine. I pulled the oil dipstick. The crankcase was full to the top. I grabbed a drain pan from the basement, put it under the car, loosened the drain plug and watched the result. First, the nice clean, thick oil drained into the pan, it was immediately followed by about a half a gallon of gasoline. My diagnosis was confirmed. While I let the gasoline drain out of the crankcase, I removed the spark plugs. They were all soaked in fuel. I turned on the ignition switch to activate the electric fuel pump and peered into carburetor. Gas was entering the carburetor and the float valve inside was not shutting off the flow when the float chamber was full. In a nose-up position, gravity was causing the fuel to continually run into the engine. Problem identified.

I’m left the spark plugs out and the crankcase drain plug out so the engine will dry out a bit before I go any further. The next step will be repairing the carburetor, putting new oil in the engine, putting the spark plugs back in and starting the engine. At that point I’ll probably be able to tell if there is any other damage. I’m hoping that there are not bent piston rods or valve stems. I did rotate the engine by hand and it seems okay. I’ll have to wait a couple of days for the parts stores to open before I can get parts and continue the repair before I’ll know for sure. I wouldn’t be at all surprised if the engine has severe damage. That would be just typical of how things have gone ever since I bought this car.

I’m beginning to believe that this car is cursed. Maybe I need an exorcist.

Friday, May 10, 2013

High Maintenance

The Fleet
Up until recently, I hadn’t been doing too much driving, once a week, perhaps, at the most, and even then I would drive our Mitsubishi Galant. I’d been writing, working on finishing a book and starting another. No need to go anywhere by car when your job is at home.

A few of weeks ago, a friend called me and made me an offer I couldn’t refuse. He needed some help renovating a building he had purchased and I agreed to help. It was an interesting project and I knew I would like doing the work. The only thing I didn’t find attractive about the job was the twenty-three mile commute each way on the Los Angeles freeways. It takes at least an hour to drive that distance and you don’t go twenty-three miles an hour, instead you go seventy miles an hour and then you stop and then you creep along like an inch worm and then you go fifty miles an hour and then you stop and then it’s back to inching along. It’s a frustrating way to travel and it’s very hard on your car. It proved especially hard on my old Volkswagens.

The first day was a federal holiday so traffic was light and the drive took about thirty minutes. Every day after that it took at least an hour, usually longer. That first day, I drove the ’65 Beetle, the little red car. That was fine and it ran well. By the end of that week, the weather warmed up and I thought I decided to drive the dune buggy. I went to start it and the battery was dead. Not dead like you leave the lights on and the battery is dead. No, dead like this was the battery that got fried when the alternator on the ’65 shorted out and started pumping huge amounts of voltage into this battery to the point where the acid began to boil and blow the caps off the battery. That kind of dead. Dead as in time to buy a new battery. So I did, a nice Sears Diehard. The car started right up.

I did the commute for about a week in the dune buggy. It was a Thursday, I think, when the brakes failed. On the freeway. In stop and go traffic. Fun. You can operate the car by not following anyone too closely, using the gears to slow the car down, downshifting and using the engine as a brake, and using the emergency brake when you have to actually come to a complete stop. You can do it, but it isn’t easy. Or safe. Or fun. I made it home. Okay, I thought, I have two other cars that I can drive, so no problem. Then, when I was driving the ’65 Beetle to run an errand, I noticed that the clutch pedal was sticking. This is a bad sign. Okay, I can still drive the Baja bug.

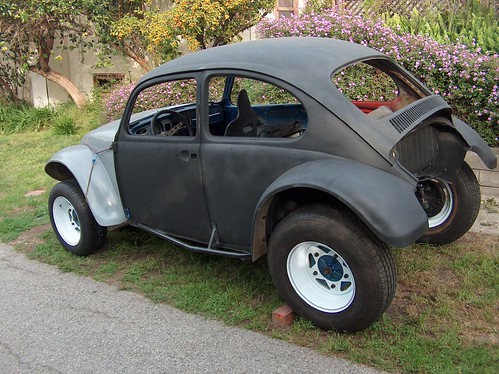
The Baja bug was drivable, but only barely. When I built it, I equipped it with dual carburetors because I thought that with the 1,776 cc motor, the duals would give me lots of power. They did indeed, but they also dumped enormous amounts of excess fuel into the engine, fouling the spark plugs and causing the engine to misfire and backfire through the carburetors. When it ran right, it was great fun to drive. Most of the time, though, it ran rough, backfired, and required me to drive very carefully so as not to foul the spark plugs. It did run, though, and it was all I had to drive at that point, so I drove it. And then I got stuck in traffic. The freeway was completely stopped ahead of me. I was able to exit just before the stoppage. I know my way around Los Angeles so I decided to go through town to get home. The Baja bug, in its current configuration was not the ideal car for driving across the city during rush hour. It sputtered and coughed and lurched its way through Beverly Hills traffic. It never stopped, but it was a driving experience I didn’t every with to repeat. Something had to be done. It was time to solve all these car problems before I had nothing to drive and was forced to give up this job opportunity because I just couldn’t get there from here.

I took at day and a half off from work and began the process of getting all the cars back in shape. I began by consulting my friends a BCE, the parts store I’ve been depending upon for the last twenty-five years. We came up with a way to make the Baja bug drivable. I’d replace the dual carburetors with a big single barrel. I ordered the parts and they promised to have them by the afternoon of the next day. I drove home to begin diagnosing the problems with the other two cars.

I started with the dune buggy. After I adjusted the brakes, I discovered that the brake master cylinder was leaking. I would need to replace it to get the brakes working again. Next I took apart the clutch linkage on the ’65 Beetle. The front end of the cable was worn paper thin and needed to be replaced. The actuating lever on the pedal was also damaged and needed to be replaced. I recalled an article I had read on the internet about an innovative solution to a long-term VW clutch problem and searched around the web until I found the part that had been highlighted in the article. I like what I saw and the reviews were one hundred percent positive, so I ordered the part.

The company is called Unique Parts and it appeared to be a one-man operation. When I placed the order I made the required Pay-Pal transfer and figured, since it was a Friday, I’d receive the part sometime the next week. I didn’t receive any shipping information that day, so I guessed I’d hear something by Monday. If not I’d follow up and see when I could expect it. The part actually arrived via U.S. Mail the very next day, Saturday. Amazing. Impressive.

My Friday wasn’t over yet, though. I called BCE and learned that they had received all the parts I needed for the Baja bug. I drove over, picked them up, drove back home and began the conversion process. It took the entire rest of the day to finish the project. I checked everything over twice to make sure I’d gotten the new carburetor installed correctly. It seemed to be perfect. I got behind the wheel and keyed the started. It took a while for the fuel pump to fill the new carburetor with gasoline, but once it did, the engine started right up. I took it out for a test drive and it worked very well. The engine was idling a bit too fast, but once I adjusted it down I was satisfied. I almost had a drivable car. The only thing it needed to be perfect was a stereo. I picked one up at Best Buy, found a speaker box at Pep Boys and hooked it up. Now I had one car ready for commuting.

Next step was to repair the clutch cable on the ’65 Beetle. I did that over the course of a few evenings after I got back from the jobsite on the other side of town, an hour at a time. The new clutch linkage installed easily. Not only did it give the cable to actuator lever connection a superior method of operation, but it moved the clutch pedal three-fourths of an inch to the left, making the car much easier to drive. Once I got everything put back in place, I took it out for a drive. The clutch action is smoother and easier. I am confident that it will also be longer lasting. Now, I had two cars up and running.

Since I was making a bit of extra money on this job, I decided that it was time to put and interior into the Baja bug. Up until now, it has just been bare metal inside. From the beginning of the Baja bug project, I had wanted to put rubber mats on the floor instead of carpet. Rubber mats in a Volkswagen is very “old school.” I ordered some, along with sound insulation for the floor and a carpet kit for the back. The carpet kit is designed to fit a car with the back seat removed, which is how I have it set up. I put the rubber mats in and they looked great. To make the carpet kit for the rear of the car work right, I had to make a wooden floor where the back seat would normally mount. Once I did that, the carpet get went in nicely with just a little glue.

Next project was to get the brakes working on the dune buggy. I replaced the master cylinder, bled the air out of the brake lines and tested the brakes. They worked just fine. Three cars running, again.

Sure, my old VWs are high-maintenance, but I like working on them. It is very satisfying to be driving a car that I built and repaired myself and have it work so well. After all the work I’ve done on all the cars, when something goes wrong, I usually know right away what it is and how to fix it. There is nothing arcane or mysterious about malfunctions of cars you’ve built from the ground up. I know every inch of them, I know when they don’t sound right, or feel right. They’re fun to drive and they’re all different. Plus, you meet some very interesting people when you drive vintage VWs. I often get stopped in parking lots and gas stations by people who want to talk about the Volkswagens they used to own. Most people wish they still had theirs. I’m happy to share stories with them and don’t mind being envied for still having mine.

Thursday, February 9, 2012

The Little Red Car is Alive!!

It Lives


In our last episode, which took place eleven months ago, the Little Red Car’s engine had finally given up and I had ordered a rebuilt 1600cc, dual port to replace it. It took about six weeks to get the rebuilt motor. My friends at Bob Costa Enterprises supplied the core for the rebuild since I didn’t want to use the one I had. The engine block that came with the car when I bought it must have been from a late model fuel injected car since it had no provision for a mechanical fuel pump to be mounted in the block. That was just another one of those little things about this car that has had me shaking my head continually since I bought it. Wherever the engine originally came from, I didn’t want to base a rebuilt engine on that block, so instead we used an earlier block.

In 1965, this car had been equipped with a 1200cc engine, single port intake and a small single barrel carburetor. The electrical system was probably 6 volt; it was powered by a generator. The 1.2 liter engine produced 40 horsepower.

When I got the car, it had a late model engine of unknown size, probably 1600cc. The single barrel carburetor is from the early 70’s. The electrical system was 12 volt and powered by an alternator. The alternator first appeared on Beetles in about 1974. I don’t know what transaxle I got, except that it was worn out and had to be replaced.

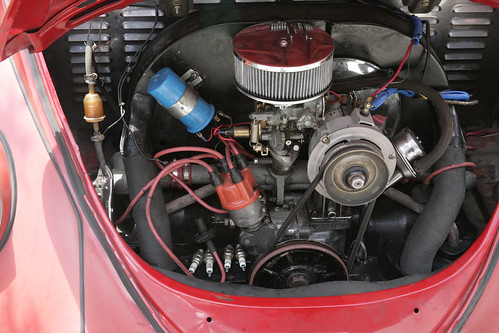
The newly rebuilt engine sat in my basement for some weeks until I was ready to remove the seized engine and replace it. It’s a moderately large undertaking to swap out an engine. It’s not all that difficult, but there are many things that have to be done to make it happen. First you’ve got to remove the old engine from the car. That involves disconnecting the accelerator cable, the heater box cables, the fuel line and the four electrical connections (ignition coil, battery, generator idiot light, oil pressure idiot light). I chose to remove most of the stuff attached to the top of the engine as well, which includes the alternator, the alternator tower, the fan shroud, the carburetor and manifold, and the distributor. You don’t have to remove all that stuff, but it’s easier the get the engine out from under the car if you do. Oh, yeah, to get the fan shroud off, you have to remove the engine compartment cover. On most cars you’d all that part the trunk lid, but since the VW engine is in the back of the car, it’s not really a trunk.

Once you’ve got all the stuff removed from the engine it’s relatively easy to remove it. There are four bolts at the front of the engine, two on top and two on the bottom. You loosen up the nuts on those and then thing almost comes out on its own. Actually, to get the engine out you have to raise the rear of the car and support it on jack-stands. Then you put a floor jack under the engine, raise the saddle up under it, pull the engine backwards off of the attaching bolts and the transaxle spline and then gently lower it to the floor. Once you have the engine out, you can remove all the rest of the parts that you will be transferring to the new engine.

The part of this whole process that I enjoy the most is assembling the new engine. What I got back from the rebuilder was the engine block with the cylinders and cylinder heads attached, plus all the important stuff inside like pistons, piston rods, crankshaft, bearings, camshaft, valve lifters, valves and springs – all the stuff that bangs around inside the engine as a result of the burning fuel. To that you have to add the stuff that feeds, ignites, electrifies, and cools. There’s a fan and some sheet metal that directs the cooling air to where it needs to go. There’s the distributor and the ignition wires and the coil that sets the fuel on fire at the proper time. There’s the carburetor and manifold that takes the liquid fuel, mixes it with the proper amount of air and feeds that mixture into the engine. And there’s the alternator that makes electricity to charge the battery, run the radio and produce the spark that burns the fuel that makes the stuff inside bang around which, ideally, provides power to move the car forward.

Putting the thing back together and getting the engine back into the car is fairly straightforward. The hard part is lining up the engine with the transaxle and getting the engine to slide into place. Sometimes it’s easy, sometimes it isn’t. This time is wasn’t, but after much grunting, swearing, resting, giving up, taking a break, trying again, swearing, resting, trying, etc., I finally got the thing put back together. At that point I’d had enough. I left the car where it was, there in the carport, and ignored it for about eight months.

About a month ago, I had some friends help me push it up the driveway to a spot near the back door where I could work on it without driving my neighbor crazy. I set the ignition timing, charged the battery, added some oil and started it up. With a few little tweaks, it ran just fine. It still does.

Since then, I’ve fixed the shifter, adjusted the clutch and drived it around town some. It works just fine. With the Little Red Car back up and running, my only problem is deciding which of my three VWs I want to drive. I’m keeping Carol in the Mitsubishi since it has heat, a/c, automatic transmission and a great stereo. I think she’s had enough adventures in my old VWs to last her a lifetime. I like driving the old VWs, but I think it’s probably an acquired taste. Most people like a few more amenities and a lot more comfort.

Friday, March 25, 2011

The Little Red Car: The Final Conflict

The Little Red Car

It was inevitable, I suppose, but I wasn’t expecting it. I thought I’d repaired everything there was that could go wrong on this car. I replaced the transaxle, the fuel pump, the distributor, the ignition coil, the brake master cylinder, , the accelerator pedal, the shift lever, the emergency brake lever, the heater control cables, the carburetor, the alternator, the tires, the front axle torsion bars, even the radio. What else could possibly go wrong with this car? The only component left, really, was the engine and that seemed to be ticking along just fine. Sure it had always had a strange rattling sound when it was running, but the sound never changed. It was the same sound every time you fired up the engine. It always sounded as if something were loose inside the crankcase, but the sound never got louder or softer. It was always the same . . . until the other day when it wasn’t.

I was out in the back yard messing around in the garden, or working on the Baja Bug, I don’t remember which, when Carol came out to start up the Red Car and head off somewhere. I said goodbye, have a safe trip as she passed. I heard the car door slam and then I heard the starter try and fail to turn the engine over. Okay, I thought, that’s not so good. Carol abandoned the Red Car and took another of our vehicles for her journey. I went on about whatever I was doing – adjusting valves on the Baja Bug, now that I think about it. I was guessing that it was a dead battery that was the cause of the Red Car’s failure to start, so, later that day, I ran an extension cord out the back door and hooked up the battery charger to the Red Car’s battery. I left it to charge overnight and figured I’d do the diagnosis the next morning.

The next day I went out to check on the status of the battery. It appeared to be all charged up, so I unhooked the charger, put it away, then rolled up the extension cord and hung it back up in the basement. I moved the Baja Bug out of its spot behind the basement door so I could put the Red Car there for testing, and then went over to the Red Car, adjusted the seat so that I could get behind the wheel, climbed in and put the key in the ignition. When I turned the key, I heard the very same sound that I had heard the day before. The starter engaged the flywheel and then failed to turn the engine. Well, then, that would seem to be Symptom Number 1 in the diagnosis. I released the parking brake but left the car in gear and then climbed back out and tried to rock the car a bit to break things loose. It wouldn’t rock and it certainly wouldn’t roll. Here we had Symptom Number 2 in the diagnosis. I was now suspecting that the engine has seized. I went back into the basement to get a big adjustable wrench to try to turn the engine over by hand. I was able to move the engine backwards and then forward a bit. I set the wrench aside, climbed back into the car and this time was able to get it started. It seemed to be running just fine and that rattling noise was still there and unchanged. I backed the car up into the space behind the basement door, set the brake, and climbed out, leaving the engine running. One thing I noticed immediately was that the belt that drives the alternator and the fan was shaking quite violently. Other than that, and the ever-present rattle, there was no obvious indication of any other problem. I shut off the engine.

What would cause that belt to shake like that? Well, perhaps one of the pulleys was wobbling a bit. No, that didn’t seem to be the case. I took off the drive belt so I could see if there was some sort of wobble in the crankshaft pulley. As I pulled and pushed on that pulley on the end of the crankshaft I could feel and hear the crankshaft moving back and forth inside the case. Diagnosis: crankshaft bearings are worn out causing excessive heat which, in turn, caused the engine to seize.

Decision time. I had gotten the thing started and it seemed to be running just fine. Do I send Carol off driving around, knowing that at some point the engine will again seize, leaving her stranded somewhere. Do I take the chance of a catastrophic failure of the engine thereby ruining the engine case and whatever else might be in the way when parts start flying around? The answers seem rather self-evident to me. I should leave the car right where it is and order a new engine. That seemed to be the most optimum thing to do at that point, so that’s what I did. It’s in the perfect spot for me to work on right now. It’s not in the way of any other projects. So, the poor dead thing can just sit there and wait until the rebuilt engine is done and I have time to make the swap.

It does leave us to wonder, Carol and I, if this car is worth all the trouble it has caused us. Just when we think we’ve replaced everything that can break, something like this happens. Once the engine has been replaced, though, there really isn’t any part of the running gear that hasn’t been brought up to standards. Still, cars have moving parts which wear out, and this is a 1965 VW we’re talking about, so inevitably sometime in the future something else will fail on this car. I have to maintain a rather philosophical attitude about this car; otherwise I’d be tempted to have the thing hauled off to the junk yard and crushed in order to keep anyone else from having to go through what we’ve gone through with it.

Saturday, February 26, 2011

Return of the Little Red Car

Alternator

You may remember from our last episode that the Little Red Car had shorted out its electrical system on the freeway and had nearly gotten us all killed. Little did we know that this problem created another, secret, hidden problem that didn’t show up until several weeks had passed. Like high blood pressure, this problem lurked in the background, slowly doing its damage until it reached the point of no return.

Carol was behind the wheel, of course, when the Little Red Car once again stopped working. I don’t remember what I was doing when my cell phone rang, but whatever it was, it didn’t have anything to do with planning a stranded car rescue. My phone is programmed with a special ring that only plays when Carol calls. Since she was calling shortly after she had left the house, I suspected that she was having car trouble. I had her describe the symptoms of the problem to me. From the information she gave me, it sounded like another electrical problem. The lights on the dashboard were working, but the engine had quit running when she stopped at a corner and now the starter would not turn over the engine. The way she described it made it sound as if the battery had gone dead. That seemed strange to me since there had been no evidence of any problem with the charging system on the car. There are no gauges on the car for the electrical system, though, just a light that goes on when the alternator is not generating any power. She hadn’t mentioned any warning lights coming on recently.

Armed with enough information to make a selection of the tools I would likely need, I went down to the workshop and loaded up a tray with my multi-meter, a test light, some electrical tape, a couple of wrenches, a screwdriver, some wire cutters, a pair of Channel-Lock pliers and a pair of Vice Grips. If I couldn’t fix it with that, it would probably have to be towed. Since a battery problem seemed likely, I decided to drive my Baja Bug on the rescue mission. I figured that, if all else failed, I could take the battery out of the Baja Bug and put it in the Little Red Car to get Carol started and back on her way.

When I got to where Carol had stopped, and after saying “hello,” I had her get behind the wheel and try to start the car. It was obvious then, from the way the starter motor reacted, that the battery was dead. I opened up the passenger-side door and, leaning over the front seat, pulled up the bottom of the rear seat to expose the battery. The terminals didn’t look particularly corroded, so I pried off the caps to see if it was low on fluid. It wasn’t just low on fluid, it was nearly dry. It was no wonder that the car wouldn’t start. I removed the battery and set it on the sidewalk alongside the car. I then went to the Baja Bug, removed its battery and installed it into the Little Red Car. The Little Red Car now started and ran just fine. I took the nearly dry battery and installed it into the Baja Bug. It would not start the car, but there seemed to be enough power remaining to run the car, if I could get it started. I left the Little Red Car running, removed its battery and carried it over to the Baja Bug. By placing the two batteries face to face in the Baja Bug and jumping across the terminals from the good battery to the bad one, I was able to get the Baja Bug running. I then left it running, took the good battery back to the Little Red Car and re-installed it.

I sent Carol on her way and I drove the Baja Bug home. Once there, I filled the dry battery up with water. It took quite a lot to fill it up. I then hooked it up to the battery charger and left it to charge while I went back to whatever I had been doing before I was called out for the rescue mission. As I puttered around the house during the day, I thought about all the things that could have caused that battery to go dry that way. The most obvious cause was overcharging. Overcharging will cause the battery fluid to boil off, which seemed to be what had happened. The only way to be certain, though, was to put a volt meter on the alternator of the Little Red Car, and that would have to wait until Carol came home.

I had Carol park the Little Red Car behind the workshop when she got home. I got out my multi-meter, plugged in the leads and set the range for 0-15 volts. Then, I lifted the hood of the car, started up the engine and put the leads from the tester on the appropriate terminals of the alternator. The needle on the tester hit the peg on the right side of the meter and stayed there. I changed the range so that I could see how much voltage the alternator was actually producing. It read over 25 volts, over twice the voltage of the battery. No wonder the battery had boiled dry. At that point, I knew what had happened. When the electrical system had shorted out several weeks before, the short had destroyed the internal voltage regulator on the alternator. Once that happened, the alternator had no regulator at all and was just pouring every volt it could produce right into the battery the entire time the engine was running. The result: a dry battery and a car that won’t start.

Knowing what was wrong, it was a simple matter of replacing the alternator and the car was again running perfectly. I left the new battery in the Little Red Car and kept the boiled one in the Baja Bug, hoping that it hadn’t been ruined. The other day, I discovered that the boiled battery was no longer staying charged, so the next project is replacing the battery in the Baja Bug. At least that will be easy, since I already know what the problem is.

Tuesday, November 9, 2010

A Work in Progress, Chapter 7

Pump

In my enthusiasm to get the project moving ahead, during the early part of the Baja Bug project, I had cut off too much of the front end sheet metal and had to weld a one-foot section back on in order to have a way to secure the gas tank. When I bought the gas tank from my parts people, there were a variety of tanks available which all looked very similar. We selected one that looked like it would fit and I loaded it up, took it home and stored it in the basement until I was ready to install it. The one thing I didn’t know about that particular gas tank was that instead of having the normal ten gallon capacity, this one held only eight gallons. When I was installing it, the capacity didn’t really matter. Later, it would become somewhat of a problem until I realized what I was dealing with.

One of the disasters I tried to avoid with the Baja Bug project was the Fuel Line Disaster that happened during the Dune Buggy project. The Dune Buggy was built on a 1957 pan, whereas the Baja Bug is a 1967 car. When I hooked up the fuel lines on either end of the steel line that passes through the length of the pan on the Dune Buggy, I had no indication as to the condition of that steel fuel line, since it is hidden inside the center spine of the pan for much of its length. The first time I had any clue as to its condition was when I poured a couple of gallons of gasoline into the tank when I was ready to try to start up the engine. All the fuel I poured into the tank ran out of all the little holes in the steel fuel line inside the spine, eventually running out at each end of the car all over the garage floor. It was a mess and a potentially very dangerous mess, as well. I cleaned up as best as I could and waited a few days for all the fuel to dry up before I fixed the problem. After some evaluation of the situation, I decided to run a whole new metal fuel line through the inside of the car rather than try to replace the hidden line. I used malleable copper for the new fuel line and it has proven to be quite a good solution to the problem.

Given my previous experience with VW fuel lines, I was very careful when I hooked up the Baja Bug lines. To avoid another major fuel spill, I added a very small amount of gasoline to the tank until I was sure all my fuel lines were intact. It turned out that the steel line in the Baja Bug was in good condition, so the installation went very well. I hooked up all fuel lines, dropped in the tank, and tested the system. Everything seemed to be working. Of course, as with all my VW projects “seemed to be” was the key phrase for this one, too. The other component of the fuel system, the fuel pump, also wound up being a problem. The cause was another one of those little tiny, seemingly insignificant, details that I had never encountered before. I leaned that the relationship between the fuel pump, its spacer and the pump rod are very critical.

Once I had everything hooked up, it was time for a test drive. After a bit of cranking to get fuel from the tank to the engine via the fuel pump, the engine started up. With a minimum of adjustment, I got the carburetors balanced and the engine idling and drove the car around the block to make sure there were no steering, braking, or shifting problems. All systems seemed to be operating perfectly. They weren’t, but, for the moment, everything appeared to be working properly. I drove the car around the block a couple of times to be sure it was going to continue to work and, again, all systems were working. I pulled it back into the driveway and parked it. Then, I looked it over thoroughly to see if there were any obvious leaks or other problems. It looked good. So good, in fact, that I felt confident enough to take it for a ride on the freeway. It ran really well with good acceleration, adequate braking performance and predictable handling characteristics. As I was cruising south on the freeway, just a couple of miles from home, the engine sputtered and died as if it were out of gas. I coasted off onto the shoulder of the road, got out of the car and started checking out the fuel system. It appeared that the rubber line under the fuel tank had gotten kinked, shutting off the fuel flow. I straightened out the line and tried to restart the engine. I cranked the engine until the battery was too low to turn the starter any more. I had no choice at that point but to call roadside assistance and have it towed off of the freeway. They dropped the car and I on the street just a mile or so from my house. I locked the car doors and walked back to my house where I got my truck and a tow bar and went back and picked up the car.

Once I had the car back in my driveway, I began a careful diagnosis of the problem. There was adequate fuel in the tank. The fuel lines were clear back to the engine, but the fuel pump wasn’t pumping any fuel. I figured it was a defective pump, but, when I removed it, I found that it was actually a broken fuel pump. This is when I leaned about the relationship between the fuel pump, its spacer and the pump rod. If the spacer is too short, the rod pushes up too far and breaks the actuating lever inside the fuel pump. I had another fuel pump on hand and a different spacer. Once I installed the correct spacer, the fuel pump worked perfectly, and I was back on the road.

As I drove the car around town, I kept track of the fuel I was using so I could get an idea of the gas mileage I was getting. This was important because I hadn’t yet installed a fuel gauge on the vehicle. Once I knew how many miles per gallon I was getting, I could figure out how often I needed to fill the gas tank. Not yet knowing that the fuel tank held only eight gallons, all my calculations were based on a tank holding ten. I usually fill up the gas tanks on my VWs every one hundred miles, so having a tank that held only eight gallons didn’t become evident until I got lazy one day and made a trip under the assumption that I had plenty of gas left in my tank to make it to the gas station. That would have been true if the tank had held ten gallons. Since it didn’t, I ran out of gas on the freeway. Being as it was the weekend when this occurred, the freeway rescue trucks weren’t running, so I had to call my wife. She was at my brother-in-law’s house and she sent him to rescue me. He brought me a gallon can which I emptied into the tank. When I got to the gas station, it took seven and a half gallons of gas to fill that tank. That was when I discovered the real capacity of that tank. I haven’t run out of gas in that car since.

The gas tank in the Baja Bug is the only eight gallon VW gas tank that anyone has ever heard of. I’ve never bothered to replace it with a ten gallon tank. I just know that I can’t get lazy and go much beyond one hundred miles before I fill up the tank. I will leave you with this bit of advice, though: If you are going to run your VW without a fuel gauge, be sure to check the capacity of the fuel tank before taking any long trips, or carry a gallon can of fuel in the trunk, just in case.

Friday, October 8, 2010

The Little Red Car Strikes Again

Connector Fail

I was sitting in my office at my computer one recent morning checking up on the news from both the world, via a few news websites, and my friends, via Facebook, when my cell phone rang. I have my cell phone set so that it has different rings for different people. For close friends, it plays "A Pirates Life for Me," for family it plays "What Do You Do with a Drunken Sailor," and for my wife, Carol, it plays the "Theme from the Mickey Mouse Club." When my phone rang this time, it was the "Mickey" theme so I knew it was Carol who I had sent off to work just a few minutes earlier. It's rarely good news when Carol calls me this early in the day, so my heart skipped a beat or two as I grabbed my phone and pressed the little green "answer" button.

"Hello," I said.

"I can't believe I did this, but I've let my car run out of gas. I'm on the freeway just before the Buena Vista exit. The gas gauge wasn't even on reserve so I thought I had enough," wailed Carol. She went on to describe what had happened and then said, ". . . .the second hand on the clock isn't even moving."

"Try to start the car," I told her.

"Nothing happens and the gas gauge needle doesn't even move."

"You're not out of gas," I said. "It's an electrical problem."

"I don't have the number for the Freeway Rescue people, " she said.

"Never mind, I'll come and help you. I have to get dressed and grab some tools and then I'll come and help you."

"It's okay, just do your thing and . . . ."

"I'm not going to "do my thing," I'm going to throw some clothes on and come and get you. I'll see you shortly."

I swiveled my chair around, stood up and went to the bedroom. I quickly pulled on a t-shirt, socks and jeans and then went back to my office to find get my shoes from where I had kicked them off the night before. Then I grabbed a jacket, a hat and my wallet, and left the living part of the house, locking the front door behind me. I walked around to the back of the house where my workshop is, unlocked the door, turned on the light and went looking for tools. I took a couple of crescent wrenches, three open-end wrenches, a multi-bit screwdriver, a electric circuit tester, a roll of electrical tape and a handful of fuses. I locked up the workshop and went back out front to one of our other cars, the Mitsubishi Galant, tossed the tools on the floor of passenger side, started it up and headed out to rescue Carol.

She was right were she said she would be, about a mile or so from her exit. The shoulder was very narrow where she had pulled off the freeway and the traffic was roaring by at 60 mph as I pulled off the road and stopped behind her car. I looked in my left-side mirror and waited for a break in the high-speed traffic before I opened the door and got out of the car. There was very little distance between me and the cars zipping by as I sidled my way to the front of the car. There was a Freeway Rescue tow truck parked in front of Carol's car and she told me that they had just arrived. I nodded and then opened the hood of her VW to see if the problem was with the engine wiring. There it was, all right. The oil filler cap had come loose and somehow bumped the main wire from the battery to the generator, right where that wire had been repaired by someone with a crimp-on connector. It appeared that there had been just enough bare wire exposed to hit the metal cap and short out the whole system. The wire, coming from the battery, was live and when I moved it sparks flew up. I managed to get the wire isolated from the metal of the car and then I had to break it free of the metal cap to which it had become welded. It was then I discovered that the crimp-on connector had failed and the wires had come apart, allowing the loose, live wire to fall onto the metal cap. From there, it was a simple matter of stripping off some of the melted insulation from the ends of the two wires, twisting them back together, and sealing the connection with electrical tape.

I told Carol to go start the car. It started right up. We thanked the guy from Freeway Rescue and he got back in his truck and roared off. Carol and I discussed a strategy for getting back onto the freeway without getting run over by the high-speed traffic.

"See. There's a break in the flow every once in a while and I'll just zip into the stream when one of the breaks comes along," she said confidently.

I walked back, sidled back along my car, got safely into the driver's seat and started it up. I watched in horror as Carol pulled out into the traffic stream in the smallest break in the flow that I have ever seen. A 1965 VW doesn't accelerate at a neck-snapping rate, and as she toddled out into the right lane of the freeway, I watched helplessly as a big, black Ford SUV barreled up towards her rear bumper. Lucky for us, he was paying attention and got himself slowed down enough so that he didn't actually hit the little red car. When I was able to breath again, I waited for a much bigger gap in the traffic, floored the accelerator and squealed out into the right lane without incident. I followed Carol's car to the exit, saw her safely into the parking lot of the office park where she works, went around the block, got back on the freeway and returned home.

That little red 1965 Volkswagen continues to be a problem. It's not the car, of course. The car is fine. It's the previous work that's been done on it that is the problem. Just when I think I've found and repaired all the potential disasters, another one rears its ugly head. Oh well, that's the automobile for you, always something to wear out or malfunction. That's why there's a repair shop on nearly every corner.

Wednesday, September 1, 2010

A Work in Progress, Chapter 6

Dashboard Switches

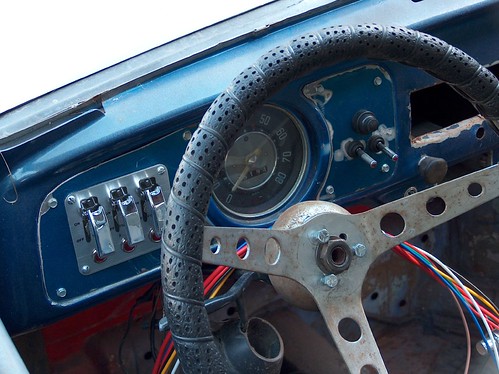
I had decided to use a dune buggy style wiring harness for this car for two reasons. The first and most important reason is that a dune buggy harness is cheap. A stock VW Beetle harness can run upwards of two hundred dollars, whereas a buggy harness is less than a third of that cost, around seventy dollars. The second and only slightly less important reason is that the buggy-style harness is simple. The stock harness has wires included for all kinds of things that I wasn't planning on including in the Baja Bug, like a clock, a stock turn signal set-up, a high and low headlight beam relay, an interior light, a radio, an ignition switch and a variety of other unneeded and unwanted amenities. I was only planning on needing wires for a bare minimum of necessary electric powered items.

What I consider necessary electrical items are headlights, tail lights, turn signals, engine electrical wires, a starter button, oil pressure sending unit, brake light switch, high/low beam headlight switch, windshield wiper motor and switch, dashboard instrument lighting, horn and horn button, and on and off switches for headlights, running lights and ignition. That's it. Like the dune buggy, I wanted this car to have a very simple wiring scheme and the buggy-style harness is perfect for that. If I need to add something to the car it will usually be at the front and it is very easy to add wires to that part of the harness after the rest of the car is finished.

The only stock VW electrical parts I used were the fuse block, the turn signal switch, the windshield wiper switch, the dimmer switch, the ignition coil, the brake light switch and the oil pressure sending unit. Everything else came from the auto parts store, or from B.C.E. I used the buggy harness as a base and then added circuits as needed to get everything hooked up. I used the wiring diagram that came with the harness as a guide and supplemented that information with a diagram I found in an old hard-back Chilton manual that I paid too much for at a used book store. I wanted almost everything to be controlled with lighted toggle switches. I figured that using the toggle switches would be simpler to wire and would look cool on the dashboard. I was right. I later discovered that the switches made troubleshooting easier as well, in that it is very easy to see how all the circuits are connect by just looking at the back of the dashboard from inside the front trunk of the car.

There were a couple of areas where I had to fabricate a solution to a problem that arose because of the way I was building the car. At the front end, because of the one-piece fiberglass cowling, I had to find a way to suspend the wires supplying the headlights and turn signals so they wouldn't drag or the ground or pull loose as the car ran down the road. After driving it for while, I had to amend the design when one of three-prong headlight plugs pulled loose while Carol was driving the car. When the plug came loose, it shorted out the headlights, and, of course, it was nighttime when the problem manifested itself. Poor Carol had to sit and wait for me to come and get the lights working again before she could drive the car home. Once I figured out a way to anchor the wires at the headlights, that problem was solved.

The other alteration I did to the harness was to replace the keyed ignition switch with two toggle switches and a marine-grade started button. One of the weak points in the stock VW electrical system is the ignition switch. Eventually, when you turn the key, the ignition system will activate but the switch fails to activate the starter motor. When that happens you have to crawl under the car with a screwdriver and short across the solenoid terminals to get the starter to work. It's a pain, especially if you don't feel like crawling around in the street in your nice, clean clothes. The solution I use eliminates the ignition switch. Now, when something goes wrong, it is very easy to figure out which circuit is not working.

Finally, I put most of the wires inside of blue plastic tubing. Early on, I had decided that I wanted the color scheme of the car to be black, blue and white. Not only does the blue tubing look good, it keeps the wiring harness nice and neat with no loose, dangling wires.

Everything I did with this car was done with the idea that I wanted to simplify everything I could. At the end of the build I wanted a car that would be simple to work on and simple to diagnose. I also wanted the car to be reliable. I've found that simplicity leads to reliability, so that is the direction I usually go when I building my cars.

Wednesday, August 18, 2010

A Work in Progress, Chapter 5

Axle Parts

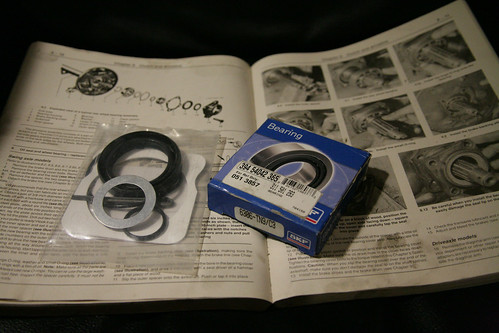
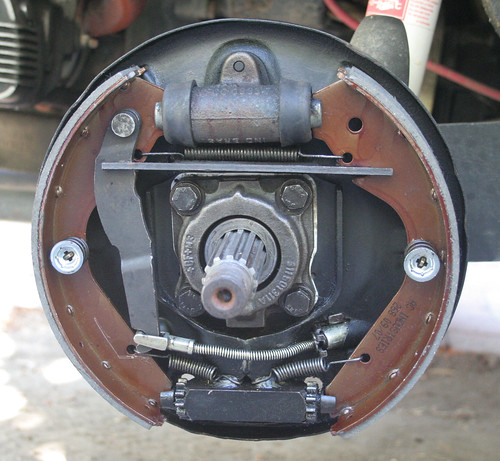
For the Volkswagen swing-arm rear axle, there are eighteen parts that must be assembled, in the correct sequence and in the correct location, to seal up the end of either the right or left side axle. Most of the parts are available for purchase in a Rear Axle Seal Kit. The eighteen parts needed are two spacers, an axle bearing, a washer, two "O" rings, a gasket, a seal, a bearing cover, the brake backing plate, four bolts and four lock-washers. If you have all the correct parts for the transaxle you are working on, it is a relatively easy project to do. If you are missing one of the parts, or one of the parts in not correct for that axle, or if you don't have a shop manual that shows the correct location and sequence for each of the parts, it is impossible to get the axle to seal. I now know, I believe, all the ways to do this project wrong.

The first thing I was missing was a proper shop manual, so I didn't know the exact order in which the parts needed to be installed, nor did I know the correct location for all of the parts. I thought I knew. I'd managed to get the rear axles of the Dune Buggy sealed up, so I thought I knew what I was doing. I didn't. I had most of it right, but, from the beginning, I was missing one key piece of information that resulted in my failure to get it right for the next six years. That's right, I've been driving this car with leaking rear axle seals for six years. Over that time, I've tried at least a dozen times to get it right and, until now, have always gotten it wrong. The problem has always been that I was certain that I knew the sequence and location for all the parts.

When you are sure you know something, you can't learn anything new about that subject. That is such an important concept that it ought to be made into a large banner and posted above every desk, every workbench, every mechanic's tool box, every kitchen, every bedroom, every library, every schoolroom, everywhere. If you think you know everything about the subject, you stop looking at that subject. You assume (always a dangerous thing to do), since you know what is going on with this area about which you know everything, that the problem has to be coming from something, or somewhere, else. I knew that I had the axle put together correctly, so the leak had to be caused by something else.

The problem was compounded by the fact that I was attaching Type III style brakes to the axle. This meant that the backing plate was different from what was originally installed on the car. That fact added just enough of a variable to blind me to the fact that I didn't actually know everything about putting together a rear axle.

What I know now is that when I first put the car together, I used all the right parts, but had installed one of the "O" rings in the wrong location. The way I did it made logical sense to me at the time, but in truth, was not logical at all. I was certain that I was doing it right, though, so when I discovered that I had a leak, I looked to other areas for the cause. I decided that if must be the bearing cover that was the problem, since that seemed to be where the leak was originating, so I got some different bearing covers and installed them. Big mistake. Major mistake. I thought that, since they looked pretty much the same with the exception of a drain hole at the bottom, the bearing covers where interchangeable. I was wrong about that.

If there is one lesson that I have had to learn over and over and over again throughout my life, it is that if you don't have a fundamental understanding of what you are doing, you are eventually going to run into trouble somehow. If you don't know how and why a system works, you'll never be able to solve the problems that occur when that system stops working. If you only know that this part goes there, but not what that part does in relation to the other parts to which it is attached, you'll be helpless when something goes wrong. You'll wind up doing what most people do when they have a problem, you'll attribute the source of the problem to the wrong cause. Once you've done that, you are on the road to frustration and despair. In the case of auto mechanics, you will replace part after part after part and never solve the problem, since you are attempting to fix something other than the actual thing that is broken. If you are like me, you can go down this road for six years before you finally discover that you don't know everything there is to know about a given subject.

The secret to problem solving is observation. It's not just a simple matter of looking at a thing. You have to look at that thing and actually see what is there. You can't look at it and decide that, because it looks like something similar, it is identical in form and function to that other thing. You have to look at the thing in relation to its surroundings. How does it fit? Where does it fit? If other parts need to fit on it or into it, will they? Look at the thing, not just for its similarities to other things with which you are familiar, but also for its differences from those other things. This sort of observation is a skill that if not constantly and consciously practiced and exercised will soon atrophy. You must work at your observation skills. They are the key element in your war against assumption. Don't assume. Observe. If you hone and polish your observation skills, you will find that they will serve you very well in all areas of your life.

After six years of 90 weight axle lubricant dripping all over my wheels and brake shoes, after a dozen or more attempts to fix the leak, after cleaning and replacing several sets of oil-soaked brake shoes, after giving up and resigning myself to never having rear brakes, I finally got fed up with the problem and decided to solve it once and for all. I finally got a proper shop manual and read it. Even then, I still got it wrong, so I read it again. Then I looked. I looked at the photos in the manual, and I looked at the parts on the car. I discovered two things. The first and most obvious was that I had been installing one of the "O" rings in the wrong place. The second was that the bearing cover that I had installed years ago as a attempt to solve the problem was the wrong part. The cover I had substituted for the original part was not holding the bearing in place, but was instead allowing the axle to move in and out about a eighth of an inch. It's no wonder that there were problems, I had made foolish mistakes due to my failure to observe.

What I did wrong was; first, to assume that I knew everything about assembling a Volkswagen rear axle; second, not to understand the fundamentals of the parts I was working with; and, third, not to look at what was there and see which parts were causing the problem. By assuming I knew what I was doing, I didn't allow myself observe or understand the problem. Once I finally looked at the problem and saw what was actually there, I was able to determine the cause, correct the mistake and fix the problem.

It is one thing to have a piece of data. It is quite another thing to actually apply that data to the real world. In my mind, this is the difference between the artist and everyone else. The artist knows the fundamentals of the medium in which he is working, be it painting, performing, sculpting, acting, programming computers, or fixing cars. The artist can see what is there in front of him/her, knows the fundamentals of how and why the thing works and can thus innovate, create and solve problems with an ease that seems like magic. When something goes wrong, the artist can look at the problem, know how things should be working, see where something went wrong, diagnose and solve the problem and achieve a smoothly functioning product. You can apply this viewpoint to every aspect of your life. I try to do this. I don't always succeed, but that doesn't keep me from continuing to work at it. Try it. Try living life as a artist. If nothing else, it's a lot of fun.

Friday, August 13, 2010

A Work in Progress, Chapter 4

Brakes

With the transaxle installed it was time to install the brake system. At the suggestion of my friends at B.C.E., I decided to put Type III brakes on the rear of the car, rather than the '67 style that came with the car. All the moving parts that had come with the car when I bought it were worn out anyway, so there was no reason not to start from scratch. The advantage of the Type III-style brakes is that the brake drums are substantially wider than the stock '67 drums, thus providing more surface area for the brake shoes to contact. More surface area means more friction which translates into more stopping ability. The disadvantage of changing to the Type III set-up was finding the parts. After some searching around, though, we got everything I would need to do the installation: backing plates, wheel cylinders, springs, shoes, drums and the emergency brake hardware.

I didn't trust anything that had come with the car, so I was replacing the whole system, including all the steel lines, the rubber lines, master cylinder, all four wheel cylinders and all the drums. It may not sound like much, but that's a lot of pieces: seven steel lines that have to be bent into the right shapes, four rubber lines, four wheel cylinders, four brake drums, four sets of brake shoes, four sets of hardware which includes springs and pins and retainers and adjusters, a brake fluid reservoir and a couple of pints of brake fluid. In addition, there are wheel bearings and seals and grease to deal with as well.

Getting the new brake lines installed was not too difficult. You just have to be careful not to bend the steel lines too sharply or you'll kink them, making them useless. The sequence is to bolt the new master cylinder in place and go from there. There is one long steel line that runs from the front to the back of the car where it attaches to a splitter that lets you hook up the right and left sides with shorter steel lines which attach to flexible rubber lines which, in turn, attach to another set of short steel lines. At the front there are two steel lines that attach to rubber lines on each side of the car. The objective is to end up with nice, clean, unobstructed lines that let you push the high pressure brake fluid from the master cylinder to the wheel cylinders. Pushing the brake pedal causes the master cylinder to pump the brake fluid to each of the four wheel cylinders which push on the brake shoes. The brake shoes rub on the inside of the brake drums and the resultant friction is what slows and stops the car. When all of the parts are adjusted correctly and working properly, you have a vehicle that slows and stops in a predictable manner. When you completely redo you own braking system, you gain an understanding of how the system works, and after that, it is very easy to figure out what is wrong when you encounter braking problems.

At the end of each of the four brake lines is a wheel cylinder, one for each wheel. These are mounted to a backing plate to which are also attached the brakes shoes and adjusters. The brake shoes are attached with pins and springs and fit into slots at the ends of the wheel cylinders and adjusters. The parts for the front of the car are different than the parts for the rear of the car, especially when you are mixing and matching years and models as I was. Mounting the front brake shoes and drums is rather straightforward. I installed new wheel bearing and seals in the new drums and had the front together in short order. Mounting the rear brake shoes is very similar, except you need to attach the actuating lever for the emergency brake to the rear brake shoe on each side and attach the emergency brake cable to the lever. That part is easy. Sealing up the rear axle turned into a series of errors and disasters which have continued until only a few days ago. It was another lesson that I wound up learning the hard way.

Tuesday, August 10, 2010

A Work In Progress, Chapter 3

Wide Tires and Wheels

Figuring out how to mount the wide, rear fenders turned out to be a bit easier than getting the front end lined up and latched down. When I looked at the fenders more closely, there appeared to be faint markings in the fiberglass that more or less corresponded to the mounting holes where the original VW fenders had been attached. I held each of the fenders to the body and carefully marked them at the spots where the holes needed to be drilled. Once I had the holes drilled, I attached the fenders temporarily to the body and started figuring out where I would cut off the back of the car. This was another situation where I didn't want to cut off too much, and since this area would be exposed, it would ruin the look of the car if I did it wrong. I knew where the top of the cut had to start, that much was obvious from where the fenders ended. I just had to decide where the cut on each side would end. I thought about it for awhile and then made the decision. I marked one side, made some measurements and then marked the other side. I got out my trusty Saws-All and made the cuts. It looked pretty good. I had the right shape for the body, now it was time to finish up the sanding and put the rest of the parts in place.

There was one piece of fiberglass that I had purchased that ended up being that last part I would attach to the car. I had bought this whale-tail spoiler that I thought would look great and would also protect the engine from the elements to some degree or another. I knew it had to be mounted on the back of the car, but no matter how many times I brought it out of the basement and set it against the body, it wouldn't line up in any logical place where that it could be mounted. It just didn't make sense and each time I would just put it away again in the basement where it would haunt me until after everything else was done.

As the engine parts had arrived, I assembled them on a table in the basement. I had decided to go with a 1776 cc engine for this car. When I built the Dune Buggy, the first engine I tried in that car was a 1500 cc motor with all stock Type I style parts attached. It was a low horse-power set-up and, like all Type I engines, it had an upright cooling shroud with a fan inside that turned via the generator which was driven by a belt from a pulley on the end of the crankshaft. It's a very simple and traditional set-up and worked great until I decided I needed more horsepower, plus I wanted to try a Type III motor in the Buggy to give the rear end a flatter profile. The Type III motor has the cooling fan and shroud at the rear of the motor which makes the engine very flat, which is why it's called a "pancake" engine. That engine came out of my 1966 VW Squareback when I sold it, sans engine, to a guy in Highland Park, California. The Type III motor has 1600 cc's and dual carburetors. I liked the dual carburetors and the added horsepower, but it wasn't enough. I found a 2000 cc engine from a VW bus and figured out a way to match it up to my existing transaxle and ran that for awhile. That was fun, but it was too big, too heavy and too long for that car. That's when I opted for the 1776 cc engine for the Dune Buggy. That engine has been perfect for that car, plenty of horsepower, good fuel economy, and very reliable. Since the 1776 cc engine worked so well in the Buggy, I chose it for my Baja Bug project as well.

I went with the Type I configuration for the Baja Bug for the simple reason that a Baja Bug is a Type I car. I bought a 1776 cc long-block through my friends at B.C.E. in Eagle Rock, California, along with all the other parts I would need to assemble a complete engine: dual carburetors, chrome shroud, alternator (an upgrade from the generator I was running on the Buggy), chrome cooling tin around the cylinders, a .009 Bosch distributor, a mechanical fuel pump, spark plug wires, oil pressure sending unit, spark plugs, nuts, bolts and screws. It looked very nice sitting there on the table in the basement. Before I could install the engine in the car, though, I needed to replace the transaxle.

Given the condition of the car when I bought it, though it had a transaxle attached, I decided to replace whatever it came with and put in a used long-axle '68-style unit instead. I chose a used transaxle to try to economize for this project. That proved to be a mistake. Again, this was the same style transaxle that I had used in the Dune Buggy and I not only liked the extra width at the rear of the car, but I like the gearing as well. It was a great stock transaxle that worked well both on and off the highway and seemed the right choice for the Baja Bug as well. Replacing a transaxle isn't an especially difficult task mechanically, but physically it can be a bit demanding. If you're doing the job in your backyard, it involves a lot of laying around on your back rolling a big heavy mass of gears around on top of a floor jack to get everything lined up and bolted in. It's especially tricky when the transaxle tries to slip off of the jack while you're under it. I replaced all the mounting hardware at the same time, since the original 1967 parts were a bit worn out. This was my first transaxle replacement, so I learned a few new techniques as I went along. It's a good thing I did, because this installation turned out to be a practice exercise. You see, after I got the whole car put together, that used transaxle proved to be worn out and would pop out of gear on both acceleration and deceleration, so I had to repeat the whole procedure. Of course, I didn't know it was worn out at the time, so I just continued with the assembly process. There was still quite a lot to do to get the car on the road.

Wednesday, August 4, 2010

A Work in Progress, Chapter 2

Sanding Off Nearly 40 Years of Bad Paint

I had all the parts for my Baja Bug project lined up in the basement long before I was ready to use them. First, there was a lot of work to be done on the outside and inside of the body. The middle part of the body had a few dents and dings in it that would have to be repaired and the floor pan, which had rusted through in a couple of places, would also need some work before I was ready to install most of the parts I had received. I have to admit that I was more than a little overwhelmed by the magnitude of the project I had taken on and, for a moment, just didn't know where to start. I'd never done much body work, but I had seen enough of it done on television and in my repair manuals to have a rough idea of how to go about it. Sanding off the old paint was something I knew how to do, so I started there while I figured out where to start on the rest of the project.

The original color of the car was a VW blue-gray color, but over the years the car had been painted several times. Each new coat of paint had been laid down right over whatever color had been there previously, so on most of the body there was layer after layer of a variety of paint colors and types. In some places the paint was chipped and scratched, in others it was peeling. In the spots where the fenders had been bolted on and in the wheel wells, the car was a different color. As with everything about this car, this was turning out to be a bigger job that I had anticipated. As I sanded away a layer of paint, another layer would appear. I learned that the car had been painted pink at one time, and sky blue before that. It was no wonder that the paint was chipping, as it was quite thick and brittle, so any impact that caused the body to flex would crack the paint. I didn't want to gouge the sheet metal under the paint so I was using rather fine-grained sand paper and while that kept the sheet metal unharmed, it slowed down an already painfully slow and very dusty process. In addition, since I had to do this whole project outdoors, I needed to spray primer onto the bare metal I had exposed as I finished each section to keep the body from rusting. It seemed as if just the body work was going to take forever. This was certainly turning out to be a much bigger project than the Dune Buggy build. I had had to do quite a lot of sanding on the buggy's floor pan, both top and bottom, but having a whole body plus a floor pan to deal with greatly expanded the scope of the project for this car. I persevered, though, and every day I would go out and sand and prime another little section. I learned about hammering out dents and I acquired some of the basic body working tools to help me with that process. I straightened out the dents and dings as best I could.

On the inside of the car, the floor pan behind the seats had rusted through in spots. In one area it was so severe that I needed to replace that section of the floor pan. My parts guys at B.C.E. had just what I needed for that, a leftover piece of replacement pan material from a project they had done. It wasn't a perfect fit since it had been made to fit a different year car than mine, but, with a little trimming of both the new piece and the damaged area, I was able to make it work. The optimum way to do this sort of repair is to weld the new sheet metal into place and then grind the welds smooth so that you have a seamless looking final product. That's not how I did it. My welding skills, at that time, were not really up to that sort of delicate work, and my budget didn't allow for paying someone else to do the work. Instead I laid down some silicone caulking between the two sheet metal pieces and then riveted the replacement piece into place. With a little black paint, the end result was serviceable, even if it wasn't beautiful.

For awhile I would work on the car nearly every day, but sanding off all of that old paint in small sections in the evenings when I had time to work seemed like it would take forever. At one point, I lost my momentum on the project and the ugly unpainted, half-finished, fender-less hulk just sat there behind the garage while I ignored it and worked on other things. It was just too much to deal with.

Finally, the fiberglass parts arrived. What I unpacked the giant box that they were shipped in and laid them out near the car, I realized that I was in way, way over my head on this project. Here I had this huge one-piece front end that was supposed to attach to a hinged front bumper, two large fenders that were supposed to bolt to the back of the body somehow, and this big whale-tail spoiler that was supposed to attach who-knows-where or how. There were no instructions. I didn't know anyone who had ever built one of these things, so I had no one to ask. I was going to have to figure this out for myself.

I downloaded pictures of Baja Bugs from the internet. I read articles about how other people has gone about building their own cars. I would take the pictures out to the back yard and look at what I had and what they had and try to figure out how to get what I had to look like what I had envisioned. One of the major problems that held me back was that to get the end product I was looking for, I would have to cut off parts of the front and rear of the existing car. If you are going to cut parts off of your car, it's better to know exactly where to cut, because welding the parts back onto the car, if you make a mistake, is not at all my idea of a good time. I spent hours holding the fiberglass parts in place on the car and trying to figure out where to cut the body and how to attach the parts once the cuts were made. The one-piece front end didn't seem to fit right and it took a long time to figure out just where to drill the holes at the front so that it could be mounted to the hinged bumper.

I did figure out how to weld on the front bumper, but I ended up cutting off too much of the front end and had to weld a section back on so that there was a way to mount the fuel tank. Once I had the bumper mounted, I spent hours with that front end using all the bungee cords I owned to get it positioned just right before I felt confident enough to mark the places where the front mounting holes needed to be drilled. With a little innovation and a short piece of 2X4 lumber I got the front end lined up, the holes marked and drilled and the huge thing bolted to the bumper. Now I had to figure out how to install the hood hold-downs so that it would stay in place when closed. All the recommended hood hardware was just too short to work for this front end, but I found what I needed at the local auto parts store. Again, the solution wasn't pretty, but it would work and, at this point, that was all that mattered. The headlight mounting kits I had bought weren't going to work with this front end, so I had to find some other way to mount the headlights. Once I had the right headlight hardware, I need to figure out exactly what size holes to make in the fiberglass so that they could be installed. I carefully made templates out of cardboard so that the holes I had to cut would be exactly the right size. If I screwed up at this stage, I'd ruin the whole front end. Luckily, I got it right and the headlights fit perfectly. Next I needed to figure out how to mount the rear fenders and where to cut the back of the car. And I still needed to finish the sanding and priming on the middle part of the car. There was a long, long way to go.