Tuesday, November 9, 2010

A Work in Progress, Chapter 7

Pump

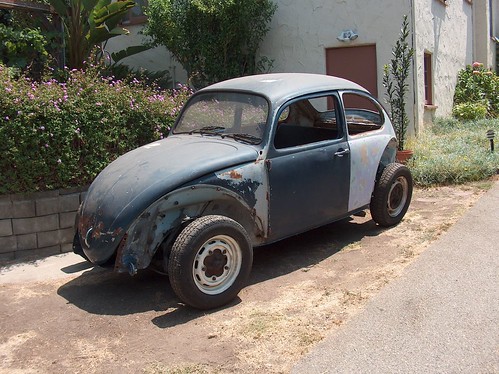
In my enthusiasm to get the project moving ahead, during the early part of the Baja Bug project, I had cut off too much of the front end sheet metal and had to weld a one-foot section back on in order to have a way to secure the gas tank. When I bought the gas tank from my parts people, there were a variety of tanks available which all looked very similar. We selected one that looked like it would fit and I loaded it up, took it home and stored it in the basement until I was ready to install it. The one thing I didn’t know about that particular gas tank was that instead of having the normal ten gallon capacity, this one held only eight gallons. When I was installing it, the capacity didn’t really matter. Later, it would become somewhat of a problem until I realized what I was dealing with.

One of the disasters I tried to avoid with the Baja Bug project was the Fuel Line Disaster that happened during the Dune Buggy project. The Dune Buggy was built on a 1957 pan, whereas the Baja Bug is a 1967 car. When I hooked up the fuel lines on either end of the steel line that passes through the length of the pan on the Dune Buggy, I had no indication as to the condition of that steel fuel line, since it is hidden inside the center spine of the pan for much of its length. The first time I had any clue as to its condition was when I poured a couple of gallons of gasoline into the tank when I was ready to try to start up the engine. All the fuel I poured into the tank ran out of all the little holes in the steel fuel line inside the spine, eventually running out at each end of the car all over the garage floor. It was a mess and a potentially very dangerous mess, as well. I cleaned up as best as I could and waited a few days for all the fuel to dry up before I fixed the problem. After some evaluation of the situation, I decided to run a whole new metal fuel line through the inside of the car rather than try to replace the hidden line. I used malleable copper for the new fuel line and it has proven to be quite a good solution to the problem.

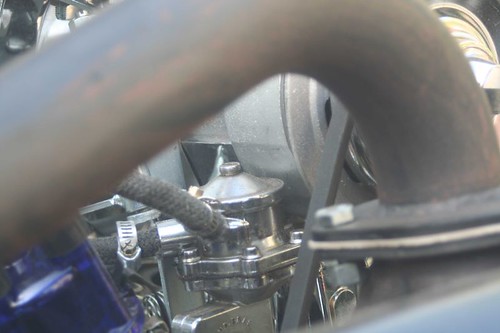
Given my previous experience with VW fuel lines, I was very careful when I hooked up the Baja Bug lines. To avoid another major fuel spill, I added a very small amount of gasoline to the tank until I was sure all my fuel lines were intact. It turned out that the steel line in the Baja Bug was in good condition, so the installation went very well. I hooked up all fuel lines, dropped in the tank, and tested the system. Everything seemed to be working. Of course, as with all my VW projects “seemed to be” was the key phrase for this one, too. The other component of the fuel system, the fuel pump, also wound up being a problem. The cause was another one of those little tiny, seemingly insignificant, details that I had never encountered before. I leaned that the relationship between the fuel pump, its spacer and the pump rod are very critical.

Once I had everything hooked up, it was time for a test drive. After a bit of cranking to get fuel from the tank to the engine via the fuel pump, the engine started up. With a minimum of adjustment, I got the carburetors balanced and the engine idling and drove the car around the block to make sure there were no steering, braking, or shifting problems. All systems seemed to be operating perfectly. They weren’t, but, for the moment, everything appeared to be working properly. I drove the car around the block a couple of times to be sure it was going to continue to work and, again, all systems were working. I pulled it back into the driveway and parked it. Then, I looked it over thoroughly to see if there were any obvious leaks or other problems. It looked good. So good, in fact, that I felt confident enough to take it for a ride on the freeway. It ran really well with good acceleration, adequate braking performance and predictable handling characteristics. As I was cruising south on the freeway, just a couple of miles from home, the engine sputtered and died as if it were out of gas. I coasted off onto the shoulder of the road, got out of the car and started checking out the fuel system. It appeared that the rubber line under the fuel tank had gotten kinked, shutting off the fuel flow. I straightened out the line and tried to restart the engine. I cranked the engine until the battery was too low to turn the starter any more. I had no choice at that point but to call roadside assistance and have it towed off of the freeway. They dropped the car and I on the street just a mile or so from my house. I locked the car doors and walked back to my house where I got my truck and a tow bar and went back and picked up the car.

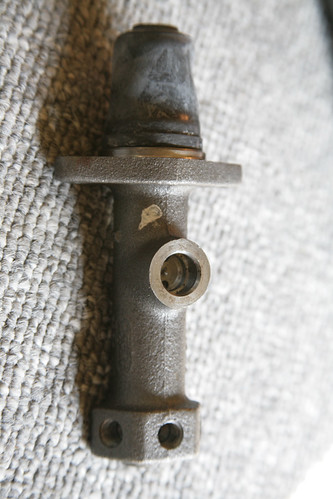
Once I had the car back in my driveway, I began a careful diagnosis of the problem. There was adequate fuel in the tank. The fuel lines were clear back to the engine, but the fuel pump wasn’t pumping any fuel. I figured it was a defective pump, but, when I removed it, I found that it was actually a broken fuel pump. This is when I leaned about the relationship between the fuel pump, its spacer and the pump rod. If the spacer is too short, the rod pushes up too far and breaks the actuating lever inside the fuel pump. I had another fuel pump on hand and a different spacer. Once I installed the correct spacer, the fuel pump worked perfectly, and I was back on the road.

As I drove the car around town, I kept track of the fuel I was using so I could get an idea of the gas mileage I was getting. This was important because I hadn’t yet installed a fuel gauge on the vehicle. Once I knew how many miles per gallon I was getting, I could figure out how often I needed to fill the gas tank. Not yet knowing that the fuel tank held only eight gallons, all my calculations were based on a tank holding ten. I usually fill up the gas tanks on my VWs every one hundred miles, so having a tank that held only eight gallons didn’t become evident until I got lazy one day and made a trip under the assumption that I had plenty of gas left in my tank to make it to the gas station. That would have been true if the tank had held ten gallons. Since it didn’t, I ran out of gas on the freeway. Being as it was the weekend when this occurred, the freeway rescue trucks weren’t running, so I had to call my wife. She was at my brother-in-law’s house and she sent him to rescue me. He brought me a gallon can which I emptied into the tank. When I got to the gas station, it took seven and a half gallons of gas to fill that tank. That was when I discovered the real capacity of that tank. I haven’t run out of gas in that car since.

The gas tank in the Baja Bug is the only eight gallon VW gas tank that anyone has ever heard of. I’ve never bothered to replace it with a ten gallon tank. I just know that I can’t get lazy and go much beyond one hundred miles before I fill up the tank. I will leave you with this bit of advice, though: If you are going to run your VW without a fuel gauge, be sure to check the capacity of the fuel tank before taking any long trips, or carry a gallon can of fuel in the trunk, just in case.

Friday, October 8, 2010

The Little Red Car Strikes Again

Connector Fail

I was sitting in my office at my computer one recent morning checking up on the news from both the world, via a few news websites, and my friends, via Facebook, when my cell phone rang. I have my cell phone set so that it has different rings for different people. For close friends, it plays "A Pirates Life for Me," for family it plays "What Do You Do with a Drunken Sailor," and for my wife, Carol, it plays the "Theme from the Mickey Mouse Club." When my phone rang this time, it was the "Mickey" theme so I knew it was Carol who I had sent off to work just a few minutes earlier. It's rarely good news when Carol calls me this early in the day, so my heart skipped a beat or two as I grabbed my phone and pressed the little green "answer" button.

"Hello," I said.

"I can't believe I did this, but I've let my car run out of gas. I'm on the freeway just before the Buena Vista exit. The gas gauge wasn't even on reserve so I thought I had enough," wailed Carol. She went on to describe what had happened and then said, ". . . .the second hand on the clock isn't even moving."

"Try to start the car," I told her.

"Nothing happens and the gas gauge needle doesn't even move."

"You're not out of gas," I said. "It's an electrical problem."

"I don't have the number for the Freeway Rescue people, " she said.

"Never mind, I'll come and help you. I have to get dressed and grab some tools and then I'll come and help you."

"It's okay, just do your thing and . . . ."

"I'm not going to "do my thing," I'm going to throw some clothes on and come and get you. I'll see you shortly."

I swiveled my chair around, stood up and went to the bedroom. I quickly pulled on a t-shirt, socks and jeans and then went back to my office to find get my shoes from where I had kicked them off the night before. Then I grabbed a jacket, a hat and my wallet, and left the living part of the house, locking the front door behind me. I walked around to the back of the house where my workshop is, unlocked the door, turned on the light and went looking for tools. I took a couple of crescent wrenches, three open-end wrenches, a multi-bit screwdriver, a electric circuit tester, a roll of electrical tape and a handful of fuses. I locked up the workshop and went back out front to one of our other cars, the Mitsubishi Galant, tossed the tools on the floor of passenger side, started it up and headed out to rescue Carol.

She was right were she said she would be, about a mile or so from her exit. The shoulder was very narrow where she had pulled off the freeway and the traffic was roaring by at 60 mph as I pulled off the road and stopped behind her car. I looked in my left-side mirror and waited for a break in the high-speed traffic before I opened the door and got out of the car. There was very little distance between me and the cars zipping by as I sidled my way to the front of the car. There was a Freeway Rescue tow truck parked in front of Carol's car and she told me that they had just arrived. I nodded and then opened the hood of her VW to see if the problem was with the engine wiring. There it was, all right. The oil filler cap had come loose and somehow bumped the main wire from the battery to the generator, right where that wire had been repaired by someone with a crimp-on connector. It appeared that there had been just enough bare wire exposed to hit the metal cap and short out the whole system. The wire, coming from the battery, was live and when I moved it sparks flew up. I managed to get the wire isolated from the metal of the car and then I had to break it free of the metal cap to which it had become welded. It was then I discovered that the crimp-on connector had failed and the wires had come apart, allowing the loose, live wire to fall onto the metal cap. From there, it was a simple matter of stripping off some of the melted insulation from the ends of the two wires, twisting them back together, and sealing the connection with electrical tape.

I told Carol to go start the car. It started right up. We thanked the guy from Freeway Rescue and he got back in his truck and roared off. Carol and I discussed a strategy for getting back onto the freeway without getting run over by the high-speed traffic.

"See. There's a break in the flow every once in a while and I'll just zip into the stream when one of the breaks comes along," she said confidently.

I walked back, sidled back along my car, got safely into the driver's seat and started it up. I watched in horror as Carol pulled out into the traffic stream in the smallest break in the flow that I have ever seen. A 1965 VW doesn't accelerate at a neck-snapping rate, and as she toddled out into the right lane of the freeway, I watched helplessly as a big, black Ford SUV barreled up towards her rear bumper. Lucky for us, he was paying attention and got himself slowed down enough so that he didn't actually hit the little red car. When I was able to breath again, I waited for a much bigger gap in the traffic, floored the accelerator and squealed out into the right lane without incident. I followed Carol's car to the exit, saw her safely into the parking lot of the office park where she works, went around the block, got back on the freeway and returned home.

That little red 1965 Volkswagen continues to be a problem. It's not the car, of course. The car is fine. It's the previous work that's been done on it that is the problem. Just when I think I've found and repaired all the potential disasters, another one rears its ugly head. Oh well, that's the automobile for you, always something to wear out or malfunction. That's why there's a repair shop on nearly every corner.

Wednesday, September 1, 2010

A Work in Progress, Chapter 6

Dashboard Switches

I had decided to use a dune buggy style wiring harness for this car for two reasons. The first and most important reason is that a dune buggy harness is cheap. A stock VW Beetle harness can run upwards of two hundred dollars, whereas a buggy harness is less than a third of that cost, around seventy dollars. The second and only slightly less important reason is that the buggy-style harness is simple. The stock harness has wires included for all kinds of things that I wasn't planning on including in the Baja Bug, like a clock, a stock turn signal set-up, a high and low headlight beam relay, an interior light, a radio, an ignition switch and a variety of other unneeded and unwanted amenities. I was only planning on needing wires for a bare minimum of necessary electric powered items.

What I consider necessary electrical items are headlights, tail lights, turn signals, engine electrical wires, a starter button, oil pressure sending unit, brake light switch, high/low beam headlight switch, windshield wiper motor and switch, dashboard instrument lighting, horn and horn button, and on and off switches for headlights, running lights and ignition. That's it. Like the dune buggy, I wanted this car to have a very simple wiring scheme and the buggy-style harness is perfect for that. If I need to add something to the car it will usually be at the front and it is very easy to add wires to that part of the harness after the rest of the car is finished.

The only stock VW electrical parts I used were the fuse block, the turn signal switch, the windshield wiper switch, the dimmer switch, the ignition coil, the brake light switch and the oil pressure sending unit. Everything else came from the auto parts store, or from B.C.E. I used the buggy harness as a base and then added circuits as needed to get everything hooked up. I used the wiring diagram that came with the harness as a guide and supplemented that information with a diagram I found in an old hard-back Chilton manual that I paid too much for at a used book store. I wanted almost everything to be controlled with lighted toggle switches. I figured that using the toggle switches would be simpler to wire and would look cool on the dashboard. I was right. I later discovered that the switches made troubleshooting easier as well, in that it is very easy to see how all the circuits are connect by just looking at the back of the dashboard from inside the front trunk of the car.

There were a couple of areas where I had to fabricate a solution to a problem that arose because of the way I was building the car. At the front end, because of the one-piece fiberglass cowling, I had to find a way to suspend the wires supplying the headlights and turn signals so they wouldn't drag or the ground or pull loose as the car ran down the road. After driving it for while, I had to amend the design when one of three-prong headlight plugs pulled loose while Carol was driving the car. When the plug came loose, it shorted out the headlights, and, of course, it was nighttime when the problem manifested itself. Poor Carol had to sit and wait for me to come and get the lights working again before she could drive the car home. Once I figured out a way to anchor the wires at the headlights, that problem was solved.

The other alteration I did to the harness was to replace the keyed ignition switch with two toggle switches and a marine-grade started button. One of the weak points in the stock VW electrical system is the ignition switch. Eventually, when you turn the key, the ignition system will activate but the switch fails to activate the starter motor. When that happens you have to crawl under the car with a screwdriver and short across the solenoid terminals to get the starter to work. It's a pain, especially if you don't feel like crawling around in the street in your nice, clean clothes. The solution I use eliminates the ignition switch. Now, when something goes wrong, it is very easy to figure out which circuit is not working.

Finally, I put most of the wires inside of blue plastic tubing. Early on, I had decided that I wanted the color scheme of the car to be black, blue and white. Not only does the blue tubing look good, it keeps the wiring harness nice and neat with no loose, dangling wires.

Everything I did with this car was done with the idea that I wanted to simplify everything I could. At the end of the build I wanted a car that would be simple to work on and simple to diagnose. I also wanted the car to be reliable. I've found that simplicity leads to reliability, so that is the direction I usually go when I building my cars.

Wednesday, August 18, 2010

A Work in Progress, Chapter 5

Axle Parts

For the Volkswagen swing-arm rear axle, there are eighteen parts that must be assembled, in the correct sequence and in the correct location, to seal up the end of either the right or left side axle. Most of the parts are available for purchase in a Rear Axle Seal Kit. The eighteen parts needed are two spacers, an axle bearing, a washer, two "O" rings, a gasket, a seal, a bearing cover, the brake backing plate, four bolts and four lock-washers. If you have all the correct parts for the transaxle you are working on, it is a relatively easy project to do. If you are missing one of the parts, or one of the parts in not correct for that axle, or if you don't have a shop manual that shows the correct location and sequence for each of the parts, it is impossible to get the axle to seal. I now know, I believe, all the ways to do this project wrong.

The first thing I was missing was a proper shop manual, so I didn't know the exact order in which the parts needed to be installed, nor did I know the correct location for all of the parts. I thought I knew. I'd managed to get the rear axles of the Dune Buggy sealed up, so I thought I knew what I was doing. I didn't. I had most of it right, but, from the beginning, I was missing one key piece of information that resulted in my failure to get it right for the next six years. That's right, I've been driving this car with leaking rear axle seals for six years. Over that time, I've tried at least a dozen times to get it right and, until now, have always gotten it wrong. The problem has always been that I was certain that I knew the sequence and location for all the parts.

When you are sure you know something, you can't learn anything new about that subject. That is such an important concept that it ought to be made into a large banner and posted above every desk, every workbench, every mechanic's tool box, every kitchen, every bedroom, every library, every schoolroom, everywhere. If you think you know everything about the subject, you stop looking at that subject. You assume (always a dangerous thing to do), since you know what is going on with this area about which you know everything, that the problem has to be coming from something, or somewhere, else. I knew that I had the axle put together correctly, so the leak had to be caused by something else.

The problem was compounded by the fact that I was attaching Type III style brakes to the axle. This meant that the backing plate was different from what was originally installed on the car. That fact added just enough of a variable to blind me to the fact that I didn't actually know everything about putting together a rear axle.

What I know now is that when I first put the car together, I used all the right parts, but had installed one of the "O" rings in the wrong location. The way I did it made logical sense to me at the time, but in truth, was not logical at all. I was certain that I was doing it right, though, so when I discovered that I had a leak, I looked to other areas for the cause. I decided that if must be the bearing cover that was the problem, since that seemed to be where the leak was originating, so I got some different bearing covers and installed them. Big mistake. Major mistake. I thought that, since they looked pretty much the same with the exception of a drain hole at the bottom, the bearing covers where interchangeable. I was wrong about that.

If there is one lesson that I have had to learn over and over and over again throughout my life, it is that if you don't have a fundamental understanding of what you are doing, you are eventually going to run into trouble somehow. If you don't know how and why a system works, you'll never be able to solve the problems that occur when that system stops working. If you only know that this part goes there, but not what that part does in relation to the other parts to which it is attached, you'll be helpless when something goes wrong. You'll wind up doing what most people do when they have a problem, you'll attribute the source of the problem to the wrong cause. Once you've done that, you are on the road to frustration and despair. In the case of auto mechanics, you will replace part after part after part and never solve the problem, since you are attempting to fix something other than the actual thing that is broken. If you are like me, you can go down this road for six years before you finally discover that you don't know everything there is to know about a given subject.

The secret to problem solving is observation. It's not just a simple matter of looking at a thing. You have to look at that thing and actually see what is there. You can't look at it and decide that, because it looks like something similar, it is identical in form and function to that other thing. You have to look at the thing in relation to its surroundings. How does it fit? Where does it fit? If other parts need to fit on it or into it, will they? Look at the thing, not just for its similarities to other things with which you are familiar, but also for its differences from those other things. This sort of observation is a skill that if not constantly and consciously practiced and exercised will soon atrophy. You must work at your observation skills. They are the key element in your war against assumption. Don't assume. Observe. If you hone and polish your observation skills, you will find that they will serve you very well in all areas of your life.

After six years of 90 weight axle lubricant dripping all over my wheels and brake shoes, after a dozen or more attempts to fix the leak, after cleaning and replacing several sets of oil-soaked brake shoes, after giving up and resigning myself to never having rear brakes, I finally got fed up with the problem and decided to solve it once and for all. I finally got a proper shop manual and read it. Even then, I still got it wrong, so I read it again. Then I looked. I looked at the photos in the manual, and I looked at the parts on the car. I discovered two things. The first and most obvious was that I had been installing one of the "O" rings in the wrong place. The second was that the bearing cover that I had installed years ago as a attempt to solve the problem was the wrong part. The cover I had substituted for the original part was not holding the bearing in place, but was instead allowing the axle to move in and out about a eighth of an inch. It's no wonder that there were problems, I had made foolish mistakes due to my failure to observe.

What I did wrong was; first, to assume that I knew everything about assembling a Volkswagen rear axle; second, not to understand the fundamentals of the parts I was working with; and, third, not to look at what was there and see which parts were causing the problem. By assuming I knew what I was doing, I didn't allow myself observe or understand the problem. Once I finally looked at the problem and saw what was actually there, I was able to determine the cause, correct the mistake and fix the problem.

It is one thing to have a piece of data. It is quite another thing to actually apply that data to the real world. In my mind, this is the difference between the artist and everyone else. The artist knows the fundamentals of the medium in which he is working, be it painting, performing, sculpting, acting, programming computers, or fixing cars. The artist can see what is there in front of him/her, knows the fundamentals of how and why the thing works and can thus innovate, create and solve problems with an ease that seems like magic. When something goes wrong, the artist can look at the problem, know how things should be working, see where something went wrong, diagnose and solve the problem and achieve a smoothly functioning product. You can apply this viewpoint to every aspect of your life. I try to do this. I don't always succeed, but that doesn't keep me from continuing to work at it. Try it. Try living life as a artist. If nothing else, it's a lot of fun.

Friday, August 13, 2010

A Work in Progress, Chapter 4

Brakes

With the transaxle installed it was time to install the brake system. At the suggestion of my friends at B.C.E., I decided to put Type III brakes on the rear of the car, rather than the '67 style that came with the car. All the moving parts that had come with the car when I bought it were worn out anyway, so there was no reason not to start from scratch. The advantage of the Type III-style brakes is that the brake drums are substantially wider than the stock '67 drums, thus providing more surface area for the brake shoes to contact. More surface area means more friction which translates into more stopping ability. The disadvantage of changing to the Type III set-up was finding the parts. After some searching around, though, we got everything I would need to do the installation: backing plates, wheel cylinders, springs, shoes, drums and the emergency brake hardware.

I didn't trust anything that had come with the car, so I was replacing the whole system, including all the steel lines, the rubber lines, master cylinder, all four wheel cylinders and all the drums. It may not sound like much, but that's a lot of pieces: seven steel lines that have to be bent into the right shapes, four rubber lines, four wheel cylinders, four brake drums, four sets of brake shoes, four sets of hardware which includes springs and pins and retainers and adjusters, a brake fluid reservoir and a couple of pints of brake fluid. In addition, there are wheel bearings and seals and grease to deal with as well.

Getting the new brake lines installed was not too difficult. You just have to be careful not to bend the steel lines too sharply or you'll kink them, making them useless. The sequence is to bolt the new master cylinder in place and go from there. There is one long steel line that runs from the front to the back of the car where it attaches to a splitter that lets you hook up the right and left sides with shorter steel lines which attach to flexible rubber lines which, in turn, attach to another set of short steel lines. At the front there are two steel lines that attach to rubber lines on each side of the car. The objective is to end up with nice, clean, unobstructed lines that let you push the high pressure brake fluid from the master cylinder to the wheel cylinders. Pushing the brake pedal causes the master cylinder to pump the brake fluid to each of the four wheel cylinders which push on the brake shoes. The brake shoes rub on the inside of the brake drums and the resultant friction is what slows and stops the car. When all of the parts are adjusted correctly and working properly, you have a vehicle that slows and stops in a predictable manner. When you completely redo you own braking system, you gain an understanding of how the system works, and after that, it is very easy to figure out what is wrong when you encounter braking problems.

At the end of each of the four brake lines is a wheel cylinder, one for each wheel. These are mounted to a backing plate to which are also attached the brakes shoes and adjusters. The brake shoes are attached with pins and springs and fit into slots at the ends of the wheel cylinders and adjusters. The parts for the front of the car are different than the parts for the rear of the car, especially when you are mixing and matching years and models as I was. Mounting the front brake shoes and drums is rather straightforward. I installed new wheel bearing and seals in the new drums and had the front together in short order. Mounting the rear brake shoes is very similar, except you need to attach the actuating lever for the emergency brake to the rear brake shoe on each side and attach the emergency brake cable to the lever. That part is easy. Sealing up the rear axle turned into a series of errors and disasters which have continued until only a few days ago. It was another lesson that I wound up learning the hard way.

Tuesday, August 10, 2010

A Work In Progress, Chapter 3

Wide Tires and Wheels

Figuring out how to mount the wide, rear fenders turned out to be a bit easier than getting the front end lined up and latched down. When I looked at the fenders more closely, there appeared to be faint markings in the fiberglass that more or less corresponded to the mounting holes where the original VW fenders had been attached. I held each of the fenders to the body and carefully marked them at the spots where the holes needed to be drilled. Once I had the holes drilled, I attached the fenders temporarily to the body and started figuring out where I would cut off the back of the car. This was another situation where I didn't want to cut off too much, and since this area would be exposed, it would ruin the look of the car if I did it wrong. I knew where the top of the cut had to start, that much was obvious from where the fenders ended. I just had to decide where the cut on each side would end. I thought about it for awhile and then made the decision. I marked one side, made some measurements and then marked the other side. I got out my trusty Saws-All and made the cuts. It looked pretty good. I had the right shape for the body, now it was time to finish up the sanding and put the rest of the parts in place.

There was one piece of fiberglass that I had purchased that ended up being that last part I would attach to the car. I had bought this whale-tail spoiler that I thought would look great and would also protect the engine from the elements to some degree or another. I knew it had to be mounted on the back of the car, but no matter how many times I brought it out of the basement and set it against the body, it wouldn't line up in any logical place where that it could be mounted. It just didn't make sense and each time I would just put it away again in the basement where it would haunt me until after everything else was done.

As the engine parts had arrived, I assembled them on a table in the basement. I had decided to go with a 1776 cc engine for this car. When I built the Dune Buggy, the first engine I tried in that car was a 1500 cc motor with all stock Type I style parts attached. It was a low horse-power set-up and, like all Type I engines, it had an upright cooling shroud with a fan inside that turned via the generator which was driven by a belt from a pulley on the end of the crankshaft. It's a very simple and traditional set-up and worked great until I decided I needed more horsepower, plus I wanted to try a Type III motor in the Buggy to give the rear end a flatter profile. The Type III motor has the cooling fan and shroud at the rear of the motor which makes the engine very flat, which is why it's called a "pancake" engine. That engine came out of my 1966 VW Squareback when I sold it, sans engine, to a guy in Highland Park, California. The Type III motor has 1600 cc's and dual carburetors. I liked the dual carburetors and the added horsepower, but it wasn't enough. I found a 2000 cc engine from a VW bus and figured out a way to match it up to my existing transaxle and ran that for awhile. That was fun, but it was too big, too heavy and too long for that car. That's when I opted for the 1776 cc engine for the Dune Buggy. That engine has been perfect for that car, plenty of horsepower, good fuel economy, and very reliable. Since the 1776 cc engine worked so well in the Buggy, I chose it for my Baja Bug project as well.

I went with the Type I configuration for the Baja Bug for the simple reason that a Baja Bug is a Type I car. I bought a 1776 cc long-block through my friends at B.C.E. in Eagle Rock, California, along with all the other parts I would need to assemble a complete engine: dual carburetors, chrome shroud, alternator (an upgrade from the generator I was running on the Buggy), chrome cooling tin around the cylinders, a .009 Bosch distributor, a mechanical fuel pump, spark plug wires, oil pressure sending unit, spark plugs, nuts, bolts and screws. It looked very nice sitting there on the table in the basement. Before I could install the engine in the car, though, I needed to replace the transaxle.

Given the condition of the car when I bought it, though it had a transaxle attached, I decided to replace whatever it came with and put in a used long-axle '68-style unit instead. I chose a used transaxle to try to economize for this project. That proved to be a mistake. Again, this was the same style transaxle that I had used in the Dune Buggy and I not only liked the extra width at the rear of the car, but I like the gearing as well. It was a great stock transaxle that worked well both on and off the highway and seemed the right choice for the Baja Bug as well. Replacing a transaxle isn't an especially difficult task mechanically, but physically it can be a bit demanding. If you're doing the job in your backyard, it involves a lot of laying around on your back rolling a big heavy mass of gears around on top of a floor jack to get everything lined up and bolted in. It's especially tricky when the transaxle tries to slip off of the jack while you're under it. I replaced all the mounting hardware at the same time, since the original 1967 parts were a bit worn out. This was my first transaxle replacement, so I learned a few new techniques as I went along. It's a good thing I did, because this installation turned out to be a practice exercise. You see, after I got the whole car put together, that used transaxle proved to be worn out and would pop out of gear on both acceleration and deceleration, so I had to repeat the whole procedure. Of course, I didn't know it was worn out at the time, so I just continued with the assembly process. There was still quite a lot to do to get the car on the road.

Wednesday, August 4, 2010

A Work in Progress, Chapter 2

Sanding Off Nearly 40 Years of Bad Paint

I had all the parts for my Baja Bug project lined up in the basement long before I was ready to use them. First, there was a lot of work to be done on the outside and inside of the body. The middle part of the body had a few dents and dings in it that would have to be repaired and the floor pan, which had rusted through in a couple of places, would also need some work before I was ready to install most of the parts I had received. I have to admit that I was more than a little overwhelmed by the magnitude of the project I had taken on and, for a moment, just didn't know where to start. I'd never done much body work, but I had seen enough of it done on television and in my repair manuals to have a rough idea of how to go about it. Sanding off the old paint was something I knew how to do, so I started there while I figured out where to start on the rest of the project.

The original color of the car was a VW blue-gray color, but over the years the car had been painted several times. Each new coat of paint had been laid down right over whatever color had been there previously, so on most of the body there was layer after layer of a variety of paint colors and types. In some places the paint was chipped and scratched, in others it was peeling. In the spots where the fenders had been bolted on and in the wheel wells, the car was a different color. As with everything about this car, this was turning out to be a bigger job that I had anticipated. As I sanded away a layer of paint, another layer would appear. I learned that the car had been painted pink at one time, and sky blue before that. It was no wonder that the paint was chipping, as it was quite thick and brittle, so any impact that caused the body to flex would crack the paint. I didn't want to gouge the sheet metal under the paint so I was using rather fine-grained sand paper and while that kept the sheet metal unharmed, it slowed down an already painfully slow and very dusty process. In addition, since I had to do this whole project outdoors, I needed to spray primer onto the bare metal I had exposed as I finished each section to keep the body from rusting. It seemed as if just the body work was going to take forever. This was certainly turning out to be a much bigger project than the Dune Buggy build. I had had to do quite a lot of sanding on the buggy's floor pan, both top and bottom, but having a whole body plus a floor pan to deal with greatly expanded the scope of the project for this car. I persevered, though, and every day I would go out and sand and prime another little section. I learned about hammering out dents and I acquired some of the basic body working tools to help me with that process. I straightened out the dents and dings as best I could.

On the inside of the car, the floor pan behind the seats had rusted through in spots. In one area it was so severe that I needed to replace that section of the floor pan. My parts guys at B.C.E. had just what I needed for that, a leftover piece of replacement pan material from a project they had done. It wasn't a perfect fit since it had been made to fit a different year car than mine, but, with a little trimming of both the new piece and the damaged area, I was able to make it work. The optimum way to do this sort of repair is to weld the new sheet metal into place and then grind the welds smooth so that you have a seamless looking final product. That's not how I did it. My welding skills, at that time, were not really up to that sort of delicate work, and my budget didn't allow for paying someone else to do the work. Instead I laid down some silicone caulking between the two sheet metal pieces and then riveted the replacement piece into place. With a little black paint, the end result was serviceable, even if it wasn't beautiful.

For awhile I would work on the car nearly every day, but sanding off all of that old paint in small sections in the evenings when I had time to work seemed like it would take forever. At one point, I lost my momentum on the project and the ugly unpainted, half-finished, fender-less hulk just sat there behind the garage while I ignored it and worked on other things. It was just too much to deal with.

Finally, the fiberglass parts arrived. What I unpacked the giant box that they were shipped in and laid them out near the car, I realized that I was in way, way over my head on this project. Here I had this huge one-piece front end that was supposed to attach to a hinged front bumper, two large fenders that were supposed to bolt to the back of the body somehow, and this big whale-tail spoiler that was supposed to attach who-knows-where or how. There were no instructions. I didn't know anyone who had ever built one of these things, so I had no one to ask. I was going to have to figure this out for myself.

I downloaded pictures of Baja Bugs from the internet. I read articles about how other people has gone about building their own cars. I would take the pictures out to the back yard and look at what I had and what they had and try to figure out how to get what I had to look like what I had envisioned. One of the major problems that held me back was that to get the end product I was looking for, I would have to cut off parts of the front and rear of the existing car. If you are going to cut parts off of your car, it's better to know exactly where to cut, because welding the parts back onto the car, if you make a mistake, is not at all my idea of a good time. I spent hours holding the fiberglass parts in place on the car and trying to figure out where to cut the body and how to attach the parts once the cuts were made. The one-piece front end didn't seem to fit right and it took a long time to figure out just where to drill the holes at the front so that it could be mounted to the hinged bumper.

I did figure out how to weld on the front bumper, but I ended up cutting off too much of the front end and had to weld a section back on so that there was a way to mount the fuel tank. Once I had the bumper mounted, I spent hours with that front end using all the bungee cords I owned to get it positioned just right before I felt confident enough to mark the places where the front mounting holes needed to be drilled. With a little innovation and a short piece of 2X4 lumber I got the front end lined up, the holes marked and drilled and the huge thing bolted to the bumper. Now I had to figure out how to install the hood hold-downs so that it would stay in place when closed. All the recommended hood hardware was just too short to work for this front end, but I found what I needed at the local auto parts store. Again, the solution wasn't pretty, but it would work and, at this point, that was all that mattered. The headlight mounting kits I had bought weren't going to work with this front end, so I had to find some other way to mount the headlights. Once I had the right headlight hardware, I need to figure out exactly what size holes to make in the fiberglass so that they could be installed. I carefully made templates out of cardboard so that the holes I had to cut would be exactly the right size. If I screwed up at this stage, I'd ruin the whole front end. Luckily, I got it right and the headlights fit perfectly. Next I needed to figure out how to mount the rear fenders and where to cut the back of the car. And I still needed to finish the sanding and priming on the middle part of the car. There was a long, long way to go.

Thursday, July 22, 2010

A Work in Progress, Chapter 1

Front View at the Beginning

You'll sometimes hear an artist describe one of his or her creations as "A Work in Progress." To me this means that, though the artist might know what the finished work should look like, he/she hasn't quite gotten the thing to that point yet. My cars fit this definition, both the dune buggy and my Baja bug are, if nothing else, Works in Progress. The Baja bug is the best example of that concept as far as my cars are concerned. The dune buggy could be consider finished, Though there are a number of things I still want to do with the buggy, it is quite useable in its present state of completion.

A few years after I got the dune buggy into the semi-completed condition in which it has existed ever since, I felt the need for another project. I must have forgotten how much time, effort, blood and sweat had gone into the dune buggy build to have even considered starting to build another car. It was either that or some unsatisfied creative need that resides deep inside my psyche which occasionally forces its way to the surface, there to dwell until a sufficient quantity of the aforementioned time, effort, blood and sweat have been invested to cause it to subside to a point where I can return to my otherwise rather sedate life. It's not that my life isn't interesting, it's not that at all. It's just that I have always been driven to be creative in some way or another, and there's nothing that challenges one's creative abilities more than taking an old rusted-out shell of a car and turning it into a safe, reliable vehicle.

In the case of the Baja bug, when I first saw the shell that would someday be restored to a car-like state of existence, I felt as if I was rescuing the poor abused thing just moments from its being send to the scrapheap to be cut up, crushed into a cube and melted down. It was what was left of a 1967 Beetle, after all, and legend has it that 1967 was one of the best years for the old air-cooled VW Beetles. It was also a perfect candidate for transformation into a Baja-style bug, since both the front and rear of the car were in rather poor shape, and the fenders all missing, while the middle of the body was in relatively good condition, or so it appeared. Having successfully built a dune buggy, I thought I knew was I was getting into when I hooked up the barely rolling hulk to the back of my pick-up truck. Of course, I was wrong, but then, I usually am when it comes to this sort of thing.

Once I got the hideous wreck installed in the parking space behind my basement door, I began to realize the magnitude of the project I had just begun. This thing needed everything: window glass, seats, a steering wheel, gauges, a hood, fenders, door handles, interior door panels, an engine, a transaxle, brake lines, electrical wiring, headlights, turn signals, windshield wipers, tail lights, bumpers, a gas tank, fuel lines, brake lines, brake shoes, brake backing plates, brake springs, a brake master cylinder, brake wheel cylinders, brake drums, wheel bearings, wheels, tires, a fuel pump, carburetors, an alternator, a battery, a battery box, battery cables, and a wide variety of other parts and hardware. When I bought the dune buggy, at least it had a body, fenders, a front windshield, a steering wheel, seats and front tires, wheels and brakes. For the dune buggy, I didn't have to worry about doors, side windows, rear windows or body parts. This project would need all those things, plus a bit of body work on the middle part of the car. It was all a bit overwhelming. I know how to handle "overwhelming," though, and I began making a list. If you make a list of what you need, you can begin to get the project organized. As you make your list, parts fall into categories and that lets you break the project down into sections and from there into individual tasks. Once you begin to understand what needs to be done, you can start to figure out when in the sequence of the build each step has to occur. The first parts that have to be installed are the transaxle and the engine. Before that can be done, the old transaxle must be removed. If you are going to install a new transaxle, you'll want to install new mounting hardware at the same time and while you're under there, after you've got the new transaxle installed, you might want to take care of replacing the rear brake lines, since it's a lot easier to work in that space without the engine in place. Since this is a Baja bug project, you'll want to do your cutting off of the rear part of the car before you install the engine, too. And here, once again, we run into the problem that there is no real instruction manual available for Baja bug building. Planning, it's all about planning.

Before you can even start buying parts for your Baja bug project, it might be a good idea to have some idea what the final product should look like, what performance level you are trying to achieve, and, perhaps, how much money you are willing to spend. I knew I wanted a one-piece fiberglass front end and some rather wide rear fenders, all of which were offered for sale at one of my favorite on-line suppliers, J.C. Whitney. Not only did they offer the parts I wanted, but their price was about what I wanted to pay. So, I placed my order. In the meantime, I started sanding and repairing the middle part of the car's body. At about the same time, I ordered the engine and transaxle and most of the other parts I would need to move forward once I had the fiberglass parts in hand. For the first time in a great many years of buying and receiving parts from J.C. Whitney, they let me down. The fiberglass parts that they offered were not going to be available for months, if ever, so I was forced to cancel my order and find another source for what I needed. After a bit of on-line research, I found Mark V Fiberglass. They had what I needed, or at least would have it a whole lot sooner than J.C. Whitney, so I placed my order and went back to sanding and pounding out dents in the body while I waited.

Sunday, July 18, 2010

Diagnosis and Repair

Assessing the Damage

It's not only important to have the data you need to diagnose and solve a problem, you must also be able to evaluate and apply that data with regard to its relevance and its magnitude of importance in achieving the desired end result. Yeah, right.

Okay, so you've got a mechanical malfunction of some sort, say your engine sometimes won't idle. How do you fix that? The first thing you need to do is gather data. Why doesn't it always idle correctly? What is the variable that causes the problem to only occur "sometimes?" What systems are involved in regulating the idle speed? What moving parts are involved? Once you have gathered your data, you can then proceed to identify and fix the problem . . . or, you can do it the way I do.

What I usually do is to simply cope with the problem for as long as possible until it becomes so annoying, or the car becomes so completely undriveable, that I am forced to do something about it. For most problems, this method works quite well. It forces me to think about the problem every time I drive the car, since I am constantly working around it, or having to overcome it in some way just to operate the vehicle. Take the idle problem I mentioned above. Sure I could have spent a morning figuring out why the car wouldn't hold its idle speed, and then fixed it so that it would. Instead, I've been driving around for a couple of years mostly ignoring the problem, or at most, cursing the carburetor for its inability to function properly. I reached my annoyance threshold the other day and was finally forced to figure it out.

Turned out it was a pretty simple fix. I had suspected for some time that the problem had something to do with the automatic choke. This made sense to me because the choke and its linkage is designed to kick the idle up when the engine is cold and then let the idle drop back down once it gets warmed up. On my old Ford truck, the automatic choke used the heat from the coolant inside a heater hose to regulate how much choke to apply and when to open itself back up. On my VW carburetor, there is an electric coil that starts heating up as soon as you turn the ignition key to the "on" position. Once that coil reaches a certain temperature it causes the choke to open and allows the idle to return to a nice, moderate speed, unless, of course, it's not working properly, or is not adjusted correctly.

I had an errand I was running over on the west side of Hollywood when I finally decided to solve the problem. I always carry a multi-tool on my belt, just in case I might need to perform some sort of MacGyver style repair whilst on the road. Every time I stopped and parked, I would attempt to adjust the carburetor to get the consistent idle speed which I was seeking. Eventually, after a number of stops, I got the choke adjustment right and the idle speed dialed in so that it works pretty much like it should at this point.

It's not as if I don't know how to diagnose a problem, or how to repair it once I know what is causing it. It's just that sometimes the problem is so minor, that I put off fixing it until I just can't put up with it anymore. I suppose that if I was in a situation where I was not the only driver of this car, I would be more motivated to fix the minor rattles and squeaks and such that crop up from time to time, but since it's just me, I tend to let them go for as long as possible. Major stuff, safety stuff, I always fix right away, but minor tweaks always seem to get put down at the bottom of my to-do list, right down there with gauges and interior amenities. Someday I'm going to install a working fuel gauge. Someday. But after not having one for the last ten years or so, it's just not much of a priority.

Tuesday, July 13, 2010

Big Bear Bash 2010

Lean

It was Friday morning when we packed our camping gear into and onto our old dune buggy and hit the road for Big Bear Lake, California. On the way out of town we stopped to fill the gas tank and then it was a non-stop drive to Camp Tanda where we unpacked the buggy, set up our new tent, unfolded the chairs, walked over to the registration table and signed in for the 2010 Manx Dune Buggy Club's Big Bear Bash. There we collected our information packet, our event t-shirts and our Saturday night catered-dinner wrist bands. The weather was perfect, we were in our preferred campsite near the bathrooms, and we anticipated a weekend of fun playing and talking with old and new friends during the off-road runs and around camp. At the end, it proved to be all that and more.

When I think about it now, sitting at my desk in front of a computer monitor, I feel a sense of accomplishment, of satisfaction, for a task well performed. Neither my wife, nor I could be considered young people, and the dune buggy we drive is based on a 1957 Volkswagen chassis. The previous owner of the car began his dune buggy project back in the early 70s and never finished. I acquired the car somewhere around the year 2000, took six months to turn it into a safe, reliable vehicle, and have been driving it nearly every day since. So, here you have two old people loading up their old car and heading off into the mountains for a weekend of banging around on bumpy, rocky, dusty, narrow trails, fully expecting to have a great time with no mechanical or physical difficulties. Seem like a rather lofty goal, doesn't it? But, that's just what we did.

I attribute our success in equal parts to a positive attitude, good vehicle maintenance, and sheer luck. We've been attending this event for eleven years now, and have never had a bad experience. We've driven the trails in rain, hail, sleet, blazing heat, and deep, deep dust. I've put four different engines in the car over the years, not because they wore out or broke down, but because I was seeking the perfect combination of reliability and performance. The current set-up is probably about as close as I'm ever going to get, given my budget and my level of expertise. But, hey, it works, I know how to fix it when it breaks, and I'm usually able to anticipate problems and do what it takes to prevent them from manifesting while we're out in the middle of nowhere sliding down a steep, rocky road. Of course, there is always something new to learn, and this year's run had its very own teachable moment.

As learning experiences go, this one was inexpensive, easily figured out and only moderately inconvenient. The problem started when I changed the intake air-filtering system on the car. I had always admired and envied those cars that made use of foam pre-filters. These are porous foam wraps that fit around the conventional air filters on the carburetors. It looked to me as if these were a great way to keep a lot more of the fine dust that the tires churn up out of the engine. On Sunday, I discovered for myself that these filters are very good at what they do, but that they are not at all self-cleaning. I had finally gotten around to getting the proper sized pre-filter for my car a week before the Big Bear weekend. I installed it immediately and gave it no more thought, confident that it was doing its job.

The day starts at 6:00 a.m. in Camp Tanda, for us at least. It starts much earlier for the heroic folks who rise much earlier, make the coffee and set out the doughnuts. After brief morning ablutions, I walked down to the meeting area, poured two cups of coffee, one black for me, and one with cream for my wife, Carol, took them back to our campsite and got the car ready for the day's adventure while I waited for her to complete her morning routine. Once she arrived back at the camp site, we grabbed our cameras and our coffee cups and walked the short distance down the camp road to where most of the cars were lining up for the Show and Shine. The first few times we went to the Big Bear Bash, I would dutifully shine up my car and park it in the row with all the others, hoping to bask in the admiration I felt certain I would receive for my efforts at building and maintaining such a unique, beautiful car. Eventually, I came to realize that most dune buggy owners spend a lot more money on paint, and interior amenities, and a lot more time cleaning and polishing their cars than I do, and that, if I was ever going to win any prizes in the Show and Shine, I would have to do the same. Being a guy who favors function and reliability over sheer physical beauty, I chose to devote my limited financial resources to keeping the car running well instead of making it look good. Of course, it's possible to have both a great looking car and one that runs well, too, but my priority is always for the latter. So, while I don't have the best looking car in the club, I have always managed to make it back to camp after the day's run with only minor problems. Having made my choice and, thus, realized that I'll never win "Best of Show" at the Show and Shine, I just leave my car parked in front of our tent and enjoy everyone else's magnificent dune buggies, all the while keeping my eyes open for ideas that I can use to make my car better.

After the Show and Shine, there is a driver's meeting where we learn what C.B. channel we should monitor for the group we are in, plus instructions, cautions and advice needed for the days off-roading. Then it's time for one last stop at the restroom before we line up with our group for Saturday's run. We had signed up for the Holcomb Valley run. Advertised as a "no skid plate required" trail, I decided it would be just the thing for us, since there was little chance of tearing up the car but lots of potential for a some good off-road fun. Of course, I always install a skid plate before taking the car off the road, but I don't mind if we don't really need it. Our group set off toward the trail at a little after 9:00 a.m. After we got off the highway, a couple of the cars started having trouble, one of them just wasn't running right (turned out the ignition coil was mounted incorrectly), another discovered a broken transaxle mounting. Both cars turned back quite early in the run and made it safely back to camp. A bit further along the trail, the car in front of us pulled off to the side of the road and stopped. We were at the tail end of the group, so the rest of us pulled up behind them to see what the problem was. They had broken the clutch cable on the car and didn't have a replacement. Lucky for them, I did. Being that this was our tenth year at the Big Bear Bash, I had learned the weak points on these mostly Volkswagen-based cars and always packed spares of the most likely parts to break or wear out. In just a few minutes, a new clutch cable installed, we were back on the road. There were other problems with other cars as we drove along, so from time to time the group would stop and wait for everyone to catch up. When we were all back together, we would set off again until the next car broke down. In this way, we made our way to an abandoned mine, high above Baldwin Lake which is mostly dry this time of year. This spot turned out to be a decision point for the run. Duran, our group leader, offered those drivers who would feel uncomfortable crawling over some medium sized rocks where a skid-plate would be necessary an alternate route down the mountain. All but seven of the cars opted for the easier way down to the paved road which would take them home. I decided not to let a few rocks scare me off from what sounded like some good bumpy fun, so I opted to take the hard way down. It was great!! I was sure glad I had the skid plate on the car, though, as we slid across a goodly number of fair sized rocks on our way down the road. When the Intrepid Seven reached the bottom we stopped, got out of our cars and congratulated each other on making it through the gauntlet relatively unscathed. Everyone was smiling and, though most of the cars had bounced a few rocks off their skid plates, all of them were undamaged. It was the perfect ending to the run. We all made our way back to Camp Tanda where our catered dinner was being set up.

After a delicious dinner, Carol and I drove into Big Bear Village and topped off the gas tank. After all that driving around all day, it only took two and a half gallons of gas. I looked over and under the car and could find nothing to worry about. We parked the car and walked around the village for awhile, bought a couple of souvenirs, a cup of coffee for Carol, took a few photos and drove back to camp. I fell right to sleep after we climbed into our sleeping bags, tired out from all the fun we had that day.

At 6:00 a.m. Sunday, our alarm went off and we went through the same routine as the day before, except on this day, the run started a 7:00 a.m. We were scheduled to drive up on Skyline Drive which features a great scenic overlook at the top of the run as well as some beautiful scenery on the way up and down. We were so taken with one of the views across the valley where there was still snow left on the north side of the mountains that at one point I stopped the car so that Carol could get a better photo. As I slowed to a stop and disengaged the clutch the engine idled down and died. When I went to restart it, the engine would crank and crank but it just wouldn't start. I used the starter to move the car off the road and proceeded to open up the engine cover to see what I need to do to get us back on the road. Meanwhile, the cars behind us pulled up and the drivers got out to see if they could help. One of the guys said, "Knock the dust out of your air filter." I did that and discovered that my pre-filter was so clogged that it was keeping the carburetor from getting enough air for the engine to run properly. I removed the distributor cap to see if dust had invaded the ignition points, blew out the cap and reinstalled it. I got back in the car, turned the ignition key and the car started right up. Problem solved. I closed the engine cover, restarted the car and we were off again with a lesson learned: Always knock the dust out of your air filter after driving all day on extremely dusty roads. That's my kind of lesson, cheap, quick and easy. The rest of the run was without incident and we made it back to camp in time for the awards presentations and raffle.

I didn't receive any awards and we didn't win anything in the raffle, but we had another great weekend with a wonderful group of caring, helpful people and that, in itself, is more than enough to make us determined to come back next year. Maybe, we'll even try to do the Mammoth Lake run in September. Why not? We're not getting any younger, you know.

Tuesday, July 6, 2010

The Annual Dune Buggy Vacation

Packing the Car

Every year for the past 11 years, we have loaded up the Dune Buggy with our camping gear, luggage and a few spare parts and driven to Big Bear Lake, California for the Manx Dune Buggy Club's "Big Bear Bash." This is not only our favorite event of the year, it is also, usually, our only vacation of the year. The Big Bear Bash is a three day event, starting Friday at 2:00 p.m. and ending the following Sunday at around noon. In those few hours, we set up camp, go out to dinner, take in a movie, do some shopping, drive around on the back roads above Big Bear Lake, talk to other buggy enthusiasts, have an awards presentation and raffle, go for a walk, enjoy the mountains, breathe the fresh air, breathe the dusty air (when we're on the back roads), tear down camp, repack the buggy and drive back down the hill. We always have fun.

Part of what makes this a fun weekend, is that I have almost always succeeded in making the car mechanically reliable for the trip. To do that, I change the oil, check the wheel bearings, give it a tune-up, install the skid plate, replace the fuel filter, clean out the crankcase breather system, and try to anticipate whatever else might become a problem and fix it before that can happen. As I said, I almost always succeed. One year, the rear brake shoes where too thin and I ended up doing some serious damage to the brake drums before I got back home. Another year, as we were driving up a washboard road, the muffler fell off of the car. I quickly stopped, ran back and grabbed it, threw it into the car and kept going. During the lunch stop that day, I reinstalled the muffler. Most years, though, we've not had any mechanical problems at all.

We also have to get our camping gear ready for the trip. For the first 9 years of this annual event, we took along an old tent that has been in my family for 40 years or more. It was a great tent in its time and served us well, but by now it has seen its better days. So, for the last two years we've been trying out some new tents. Last year's purchase, an inexpensive dome-shaped model proved to be too small for the air mattresses we bought at the same time. Oh, they fit inside the tent alright, but that's all that would fit inside. We had wall-to-wall air mattresses last year with no room inside for anything else, which meant that all our other gear had to be stored inside the car for the night. Since we don't trailer the dune buggy, but instead load all our gear onto the car and drive it up to Big Bear, this meant lots of transferring back of forth of all our stuff. This year, we found a bigger tent at just about the right price and we're going to give that a try. I set it up in the yard the other day and it looks like it'll be just the right size.

We always take lots of pictures at dune buggy events, so we pack cameras, too. Two years ago, we learned that the trail dust can somehow find its way inside of the expensive camera lenses, so we use the good camera for shots around camp and when we're not moving, and a less expensive camera for shots on the trail. My wife, Carol, takes action shots from the passenger seat while I drive. We've gotten some really great shots in years past. Those years where there had been recent rains gave us especially good shots of the cars splashing through puddles and shallow creeks. We don't mind getting the car muddy, but we do try to keep the photography equipment dry if we can. Last year, we got some nice, if short, videos from the trail with our FlipVideo camera. Unfortunately, the batteries went dead on the trail. This year I will be sure to pack lots of extra batteries for the video camera so that we don't have a repeat of that problem.

The weather for the Big Bear weekend this year is predicted to be sunny and mild with no rain in the forecast, but you never know when it might rain in the mountains. Sometimes an afternoon shower shows up and wets down the dust. We always pack a couple of fold-up plastic rain ponchos, just in case. They've come in handy a couple of times and we were glad we had them when they did. So far, the upcoming weekend is shaping up to be one of the best ever. We're looking forward to seeing old friends, making some new ones, getting the car dirty, and having lots of fun in the mountains. I'll let you know how it went when we get back.

Wednesday, June 16, 2010

The Used Car, Chapter 4

The Little Red Bug

After doing all the previous work on our '65 Beetle, I decided that I ought to drive it for a few days just to be sure everything was okay, before turning it back over to Carol. I really didn't want her to have to experience another disaster. It was a very good thing that I made that decision.

One afternoon, I hopped in the car, started the engine and headed off to work. I was half way there, about five miles from home, and all of a sudden, when I pushed in the clutch pedal so I could shift gears, the pedal went right to the floor and there it stayed. Of course I was on the freeway, three lanes over from the right and in the middle of lots and lots of afternoon traffic. I maneuvered my way over to the right lane and took the next exit off of the freeway. As I coasted to a stop and eased the transmission out of gear, I breathed a sigh of relief that at least I was off the freeway and out of the traffic stream.

I knew that, in theory, I should be able to shut off the engine, slip the car into gear and then crank the starter. If the engine is tuned properly, again in theory, I ought to be able to start the car in gear and get it going down the street. Once the engine was running and the car was moving, it should be possible to ease the transmission into a higher gear without using the clutch. In this way, I might just be able to cripple the car home, get it parked and use another of my cars to get to work. At the next stop, I pulled over to the side of the street and called in to work to let them know that I was having car trouble and would be a little late. After a bit of experimentation, I developed a technique of coming to a stop, shutting off the engine, shifting into first gear, starting the engine, getting the car moving, easing the shifter into third gear, driving to the next stop and repeating the process. I made it home, transferred my gear to another of my VWs and got to work only about a half hour late. I was glad that the clutch failure hadn't happened to Carol.

The most common part to fail in the VW clutch system is the cable which extends from the pedal cross-shaft back to the transaxle at the rear of the car. The next day I picked up new cable from the parts store. The shop where I buy my parts is one with which I been doing business for over 20 years, so a "parts run" is quite often as much a social event as a shopping trip. This run was no exception and, after swapping a few stories, including my adventure of the day before, I paid for my parts and headed home.

The next day, I backed up the car onto a couple of ramps and began taking it apart so that I could replace the broken cable. Oddly, when I removed the pedal set from under the dash, it turned out that the cable was sound and that it was the pedal cross-shaft that had failed. You see, when you push the clutch pedal down, the shaft to which it is attached rotates and causes the hook on the other end of that shaft to pull the cable forward which in turn disengages the clutch and allows you to change gears. In the 30 plus years during which I've owned and maintained air-cooled Volkswagens, this was only the second time I'd seen this type of failure. I had the wrong part for the repair, of course, so it would take another parts run and another day or two to get the car fixed and back on the road.

Here is a bit of advice for you from someone who has learned nearly everything the hard way: If you can, take the old part with you when you go to the parts store. That way you'll nearly always end up bringing the correct part home with you. You'll notice that I said "nearly always." Sometimes the part that you took off the car and brought with you was the wrong part and was installed in error by the last person who worked on your car, so the other bit of advice I would offer you is to know as much as possible about the parts that are attached to your car. With old air-cooled Volkswagens of any year, many parts are interchangeable. That being the case, many of the parts on the car you are dealing with may already have been interchanged. Taking photos and measurements can help you identify parts that seem to be different than what was originally intended to be attached to your car. This mixing and matching of parts is not a bad thing, but when the substitution is not documented, it may take you awhile to figure out what year vehicle any given part was originally intended to be attached to. This will matter when it comes to replacing brake shoes and brake system parts, ignition parts, fuel system parts, and cables to name a few. Once you figure it all out, you might want to create a written record of some sort in which to document your findings so that you can pass them along to the next person who owns the car. They'll thank you for it, believe me.

Now that I had fixed all the major systems on this car, it was time to start working on the luxury items like the heater and the glove box door.

Friday, June 11, 2010

The Used Car, Chapter 3

Torsion Arms

One evening not too long ago, I got a call from my wife, Carol. She was on her way home from work, driving the little red 1965 Beetle again. As she was exiting the parking garage at her office, she had noticed that there was a squeaking noise coming from the front of the car and that it was pulling to the right. She wanted to know what to do. Should she call the auto club and have the car towed home or should she try to drive it?

Over the years that I have been married to Carol, I have from time to time received phone calls from her wherein she described to me various mechanical failures and symptoms that had occurred while she was driving one of the many cars we have owned over the years. Often, I am able to diagnose the problem correctly from her description of it. I have usually them proceed to load my car with the tools and parts I think I'll need to fix the car and have quite often succeeded in making the needed repairs and rendering the car drivable. This car, this 1965 VW Beetle, has stumped me again and again. The failures that happen to this car are unlike any I have ever seen or even heard about. I am continually surprised and amazed at the level of incompetence displayed in the previous work done on this car.

I had just replaced the brake master cylinder and adjusted the brakes on this car. Doing that requires one to jack up the car and turn the wheels by hand, so I couldn't imagine what would all of a sudden cause it to squeak and pull to the right. I figured it might be a bad wheel bearing, or a sticking brake shoe on the right front wheel. I told Carol to try to drive the car home, but cautioned her to take it slow and drive the back roads and not try to take the freeway.

Amazing woman that she is, Carol once again made it home in a car that should have been impossible to drive. Not only that, but she maneuvered it into its parking space which also should have been impossible, given the fact that the right front wheel and most of its supporting parts where trying to slide off of the front axle beams.

When I looked at the car the next day, it truly did appear that the car was undrivable. It should have been. Either that, or Carol had, once again, decided that she would make it home in the car and, then, once she has arrived, the car was free to collapse, which it did.

In the world of auto mechanics, there are a few people who seem to have an innate ability to fix just about anything. The person or persons who had previously done work on this car and not among them. No, the person or persons who previously did work on this car are among the least competent people in existence. In this particular instance, the previous work done had actually rendered the car dangerous to drive, potentially fatal to drive.

Let me explain a bit about how the front suspension of a 1965 VW is supposed to work. Bolted to the front of the car are a pair of tubes, one above the other. Inside each of these tubes are six flat bars, on each end of these sets of bars and in the middle a small dimple has been drilled into which a set screw is driven. The set screw in the middle keeps the bars from sliding side to side, the set screws on either end keep the arms, to which are attached the tire and wheels, from sliding off the ends of the bars. The bars and the arms, along with the shock absorbers, all work together to keep the tires in contact with the road, thereby allowing the car to steered and stopped.

What I discovered when I started repairing the front suspension was that some of the bars where missing and one set was installed so as to turn the dimple 90 degrees away from the set screw, allowing the arms and the tire and wheel to slide off the end of the bars. When Carol finally stopped the car in its parking space, the arms had slid about 4 or 5 inches off the end of the bars. Had that occurred at freeway speed it would have cause the car to veer sharply to the right, likely flipping it over. At least she had taken to heart my advice about taking it show and staying off the freeway.

I replaced all the bars and put everything back the way it was supposed to be. After that, the car drove just fine -- straight down the road with no problems. About a week later, while I was on my way to work in the car, I got to experience driving an undrivable car for myself, but I'll save that story for the next chapter in this seemingly unending saga.

Tuesday, June 8, 2010

The Used Car, Chapter 2

Master Cylinder

My wife, Carol, has an unmatched ability to cope with adversity, especially when it comes to automobiles. When I first met her, she was driving a Datsun 510 station wagon. That poor little car was, I'm sure, worn out when she got it. She did the best she could to keep the car running with the help of friends and local mechanics, but time takes its toll from all things mechanical and this car had paid more than its share into that account. All the rubber seals on the side windows had deteriorated to the point where the windows were loose it their frames and rattled constantly as you drove along. By the time that I met Carol, the car has started to develop electrical problems, which are often the hardest to diagnose, especially intermittent electrical problems. There was one nearly legendary occasion when, as she was driving over a mountain pass, the engine just stopped running. Now, this was back in the days before cell phones, so she was alone near the top of a mountain and the only way to summon help was to stand at the side of the road and wave at whichever passing motorist might drive by. Did she panic? Did she jump out of the car and starting trying to flag down a rescuer? No, not Carol. Instead, when the engine stopped, she coasted off onto the shoulder of the road, shut off the ignition and, completely convinced that if she just parked the car and waited awhile it would eventually start, proceeded to settle back in her seat and read a book. Lucky for her, two kindhearted and more mechanically savvy gentlemen from the nearby town stopped and asked her if there was a problem. Carol smiled and told them, with great conviction, that the car would start after awhile and that she would just wait. These fine gentlemen took an more pragmatic approach to the situation, raised the hood on the Datsun, proceeded to jiggle a few loose wires, got the car running and followed her down the mountain to be sure she made it to town.

Who knows whether the two gentlemen actually fixed the car, or if, instead, Carol's simple act of faith caused it to run again. I'm not willing to completely discount the power of Carol's decision that the car would be in running condition about the time that she needed it to be that way. Heck, I fixed a clothes dryer once by just touching it. Laugh, if you will, but it wasn't working before I touched it, and, yet, after I touched it, it worked quite well. I'm thoroughly convinced that there is more to this world than simply nuts and bolts and mechanical engineering. Carol, herself is living proof that there is more to driving a car than physics. I know this because she's driven cars in a condition that should have made them physically impossible to drive.

Take, for example, the incident of the brake master cylinder on her VW Beetle. Normally, when a master cylinder goes bad, it does so gradually, so that there are some warning signs of its imminent failure such as fluid leaking from the seals, or a mushy brake pedal. Not this time. Carol got in the car one evening to drive home from work and, upon application of her foot, the brake pedal went straight to the floor. Most people would have called for a tow truck or would have gotten someone to give them are ride home, but not Carol. No, she just drove home with no working brake pedal. Aside from the engine, the manual transmission and friction with the road, she had only the hand brake to use to slow and stop the car. I found out later, that not only wasn't the hand brake working properly, it wasn't even the proper part for that car. When I got home and she told me what had happened, I thought she had exaggerated the extent of the brake failure and that there must have been some pedal left in the system. In reality, I discovered that she had exactly described the problem. There are few people who would ever have attempted to do what she did, let alone have been able to do it successfully. There's obviously, more to driving cars than your mechanics and engineers have ever thought about.

My part in the story was a bit simpler, though not without some adversity. I checked over the brake system and narrowed the problem down to a faulty master cylinder. Even after I bought a new one and replaced the old one, the brakes wouldn't work. As it turned out, the part I purchased was defective and I had to do the whole job over again before I had restored the braking system to proper working order.

With all the other work I'd done on this car, I figured that, at this point, I was done with it for awhile, except for routine maintenance. I was wrong again, as wrong as I was on the day I bought this car.

Wednesday, May 26, 2010

The Used Car

65 VW

"Buy a used car and you're buying someone else's problem." I've heard that line and said that line many, many times. I suspect the same thing was said about buying a horse in the years before there were cars. Sometimes it's worse than that, though, sometimes you buy a "disaster waiting to happen."

I own one of those. When my wife's 1967 VW Beetle was stolen from in front of our house, I needed to get her another car right away. Rule #1 in buying a used car: Never get in a hurry. Do your research, take your time, have the car checked by a competent mechanic, and don't get pressured into buying. Be willing to let the deal go and know that another car will come along. If you hold firm to Rule #1, you'll minimize the unknowns and likely be aware of potential problems in time to correct them before they become dangerous.

The first thing I did when I bought the replacement car was to violate Rule #1. The car I found looked good sitting there in the lot of the VW shop. The paint was in fair condition and the engine had been cleaned up and looked good. When we started it up it ran well and made no unusual noises. It had custom seats and a custom instrument panel. Heck, the gas gauge even worked. I figured we had a winner and bought the thing.

In my haste to violate Rule #1, I missed several important clues. The first was that any VW shop in the Los Angeles area that does good work should be busy. This place was not. The second clue was that any old VW that is that clean probably has something to hide. It did. Since the car's registration had expired, we weren't able to test drive it and had to take the seller at his word with regard to the safety and road worthiness of the vehicle. It was neither safe nor road worthy. Given the above, it was overpriced as well.

Right away we noticed that the transaxle wouldn't stay in gear when you let off of the gas pedal. My wife discovered this right away as she was driving the car home from the VW shop after we bought it. It was at this time that I violated Rule #2 which states: "Try all the cheap ways to fix a problem before you try the expensive ones." The car came to us with a fancy-looking after market shifter, so obviously that couldn't be the problem, right? No, it had to be the transaxle that was worn out and needed to be replaced. After the newly rebuilt transaxle had been installed, we discovered that the fancy shifter had been the problem all along. I replaced it with an inexpensive, used stock shifter and the problem was solved.

The very next thing I did with this not-so-very-fine used car was to violate Rule #3. Rule #3 applies to all mechanical, electrical and philosophical aspects of the universe and, simply stated, is: "If it ain't broke, don't fix it." My justification for ignoring that very important rule was my conflicting belief in the K.I.S.S. rule. "K.I.S.S.", of course, stands for Keep It Simple Stupid. I had been told for years by a variety of Volkswagen car enthusiasts that the simple 009 Bosch centrifugal advance distributor was the ultimate in state-of-the-art simplicity. This belief was in accord with my own belief in the K.I.S.S. rule so I accepted it without question. My blind faith in this consensus of the masses has resulted in all my VWs performing poorly, while I constantly adjusted other systems to make up for the inherit fault in the distributor. So, with all this in mind, and on a car that was running just fine, I purchased and installed a new 009 Bosch distributor. Soon after that, I got a call from my wife who complained that the car was sputtering and losing power. Just as I was ready to get in my car to go rescue her, she called to say that the car was now running fine. I had her bring it home and park it so that I could figure out what was wrong.

Now I violated Rule #4: "Only change one thing at a time." Since the only change I had made to the car so far was installing the new distributor, what I should have done at this point was re-install the old distributor and see if that solved the problem. Instead, I began to carefully and systematically replace every other part and system that might cause hesitation in the engine. This eventually included the fuel pump, the ignition wires, the fuel filters, the carburetor and the ignition coil. Of course none of these replacements had any effect on the problem at hand, but I did discover that this car had an electric fuel pump, which certainly was not the way the car originally had been equipped from the factory. I also discovered, two fuel pumps later, that the fuel system was working perfectly, especially after I replaced the pump that came with the car, which, though it was apparently working just fine, was located in the left rear wheel well and held in place by a couple of lengths of mechanic's wire.

If I may digress for a moment, the proper location for the electric fuel pump is, ideally, close to the fuel tank where it can push the fuel into the carburetor, rather that at the engine (or in the left rear wheel well) where is has to pull the fuel from the tank and then push in into the carburetor. So, not only was the pump at the wrong end of the car, it was hanging precariously near the left rear tire where it was exposed to the possibility of being destroyed by flying debris picked up from the road by said tire and thrown around inside the wheel well. Certainly not the best choice of locations for hoses, a pump and a filter full of flammable liquid. I relocated the fuel pump to its proper spot under the fuel tank at the front of the car and tested the system. It worked exactly as it should.

Believing the problem had been solved, I took the car for a test drive and, at long last, it seemed to run just fine. Sadly, the very next time I drove it, the problem was back - loss of power, sputtering and no acceleration. By this time I knew that there wasn't a problem with the fuel system - all of that was working - so it had to be electrical. It is amazing how far down the wrong road I have to drive sometimes before I realize that I've taken a wrong turn.

I checked over the wiring, replaced connectors, changed spark plug wires and still was unable to resolve the problem. Having now violated all the rules of auto repair, I stepped back from the whole situation and started analyzing it logically. The engine lost power, sputtered, wouldn't accelerate, yet it would start and idle perfectly. The problem was intermittent. Sometimes the thing worked perfectly. I thought about all the parts I had replaced and, at last, realized that there was only one part I hadn't yet replaced - the condenser. the condenser is a $3 part that stores electricity like a little battery and releases it all at once when activated. Could that be the problem? The part in question had come pre-installed on that new distributor which I had replaced at the beginning of this story. How could a brand new condenser not be working? Still, I'd tried everything else, why not try that? I keep several condensers around the work shop, so I found the correct one, removed the possibly defective one, and installed the new one.

Problem solved!! And lesson learned. Learned the hard way, but learned well and thoroughly and at great expense. Of course, this was only the beginning of my problems with this car, but I'll save those stories for the other chapters of this saga.