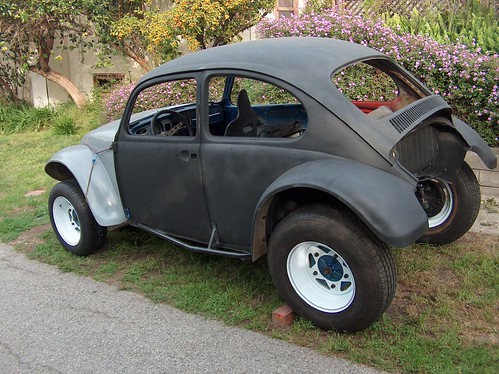
Figuring out how to mount the wide, rear fenders turned out to be a bit easier than getting the front end lined up and latched down. When I looked at the fenders more closely, there appeared to be faint markings in the fiberglass that more or less corresponded to the mounting holes where the original VW fenders had been attached. I held each of the fenders to the body and carefully marked them at the spots where the holes needed to be drilled. Once I had the holes drilled, I attached the fenders temporarily to the body and started figuring out where I would cut off the back of the car. This was another situation where I didn't want to cut off too much, and since this area would be exposed, it would ruin the look of the car if I did it wrong. I knew where the top of the cut had to start, that much was obvious from where the fenders ended. I just had to decide where the cut on each side would end. I thought about it for awhile and then made the decision. I marked one side, made some measurements and then marked the other side. I got out my trusty Saws-All and made the cuts. It looked pretty good. I had the right shape for the body, now it was time to finish up the sanding and put the rest of the parts in place.
There was one piece of fiberglass that I had purchased that ended up being that last part I would attach to the car. I had bought this whale-tail spoiler that I thought would look great and would also protect the engine from the elements to some degree or another. I knew it had to be mounted on the back of the car, but no matter how many times I brought it out of the basement and set it against the body, it wouldn't line up in any logical place where that it could be mounted. It just didn't make sense and each time I would just put it away again in the basement where it would haunt me until after everything else was done.
As the engine parts had arrived, I assembled them on a table in the basement. I had decided to go with a 1776 cc engine for this car. When I built the Dune Buggy, the first engine I tried in that car was a 1500 cc motor with all stock Type I style parts attached. It was a low horse-power set-up and, like all Type I engines, it had an upright cooling shroud with a fan inside that turned via the generator which was driven by a belt from a pulley on the end of the crankshaft. It's a very simple and traditional set-up and worked great until I decided I needed more horsepower, plus I wanted to try a Type III motor in the Buggy to give the rear end a flatter profile. The Type III motor has the cooling fan and shroud at the rear of the motor which makes the engine very flat, which is why it's called a "pancake" engine. That engine came out of my 1966 VW Squareback when I sold it, sans engine, to a guy in Highland Park, California. The Type III motor has 1600 cc's and dual carburetors. I liked the dual carburetors and the added horsepower, but it wasn't enough. I found a 2000 cc engine from a VW bus and figured out a way to match it up to my existing transaxle and ran that for awhile. That was fun, but it was too big, too heavy and too long for that car. That's when I opted for the 1776 cc engine for the Dune Buggy. That engine has been perfect for that car, plenty of horsepower, good fuel economy, and very reliable. Since the 1776 cc engine worked so well in the Buggy, I chose it for my Baja Bug project as well.
I went with the Type I configuration for the Baja Bug for the simple reason that a Baja Bug is a Type I car. I bought a 1776 cc long-block through my friends at B.C.E. in Eagle Rock, California, along with all the other parts I would need to assemble a complete engine: dual carburetors, chrome shroud, alternator (an upgrade from the generator I was running on the Buggy), chrome cooling tin around the cylinders, a .009 Bosch distributor, a mechanical fuel pump, spark plug wires, oil pressure sending unit, spark plugs, nuts, bolts and screws. It looked very nice sitting there on the table in the basement. Before I could install the engine in the car, though, I needed to replace the transaxle.
Given the condition of the car when I bought it, though it had a transaxle attached, I decided to replace whatever it came with and put in a used long-axle '68-style unit instead. I chose a used transaxle to try to economize for this project. That proved to be a mistake. Again, this was the same style transaxle that I had used in the Dune Buggy and I not only liked the extra width at the rear of the car, but I like the gearing as well. It was a great stock transaxle that worked well both on and off the highway and seemed the right choice for the Baja Bug as well. Replacing a transaxle isn't an especially difficult task mechanically, but physically it can be a bit demanding. If you're doing the job in your backyard, it involves a lot of laying around on your back rolling a big heavy mass of gears around on top of a floor jack to get everything lined up and bolted in. It's especially tricky when the transaxle tries to slip off of the jack while you're under it. I replaced all the mounting hardware at the same time, since the original 1967 parts were a bit worn out. This was my first transaxle replacement, so I learned a few new techniques as I went along. It's a good thing I did, because this installation turned out to be a practice exercise. You see, after I got the whole car put together, that used transaxle proved to be worn out and would pop out of gear on both acceleration and deceleration, so I had to repeat the whole procedure. Of course, I didn't know it was worn out at the time, so I just continued with the assembly process. There was still quite a lot to do to get the car on the road.


No comments:
Post a Comment