The only way to keep from getting completely overwhelmed by this kind of project is to break it down into simple, individual tasks, such as: 1. Remove old transaxle, 2. Install new transaxle, 3. Install new rear brake backing plates, etc. Once, you've done this, you will be able to see the sequence in which these tasks must be done. You can't install the engine until you have swapped out the transaxles, and you can't install the new brake shoes until you've attached the backing plates and the new wheel cylinders. It's like that old song, "Them Bones," where you learn that the hip bone is connected the the thigh bone and the thigh bone is connected to the knee bone. When you've figured out the sequence in which to perform all the tasks, you will find that the project becomes a bit easier to understand. You will also save yourself the extreme frustration of having to go back and remove parts that you've already installed when you find out that you got the sequence wrong and that this new part goes in behind the work you've already done. In short, planning is one of the keys to making any project one you will enjoy and complete, rather than one you will give up on and sell to someone else to complete.
One of the first things I needed to do with my project was to swap out the transaxle. For you non-car people, the transaxle is the thing that has all the gears inside it that you will later be shifting with the gear shift lever that you will install later. The transaxle is also where the power from the engine is transferred to the wheels so that the car can more forward and backward. The transaxle is where you attach the engine to the car, too, so you can see that it's installation lines up early in the assembly sequence.
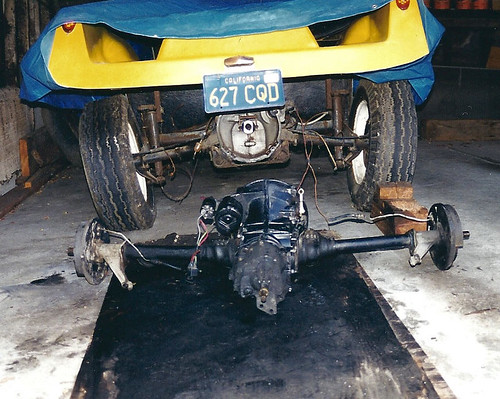
This particular dune buggy is built on a 1957 floor pan. One bit of advice, don't assume that the old rubber mounts that have been holding the old transaxle onto the pan for the last forty-two years will be adequate to hold the new transaxle which you are about to mount on the car. If you do that, you will soon have to replace said rubber mounts with new ones, and take it from me, it is much more difficult to do that when you've already bolted the transaxle and engine in place in the car.
Everything and anything is always and forever based on fundamentals. Fundamentals are those basic building blocks upon which everything else stands. They are your foundation. Fundamentals are simply basic truths. Everything on your car is attached to, or rests on top of, the frame. All the parts of your car depend upon other parts to function. If the parts are not attached to a solid foundation, their relationship to each other will change at the whim of every bump in the road. This will ultimately result in the untimely demise of some vital element. What this means to you is that if your fundmentals are solid and true, you will get where you need to go. If they are not, you will wind up stranded somewhere waiting for someone else to come along and help you. You might think this could apply to life and living. Surprise!! It does, indeed.
So, here's the sequence: 1. Remove the old transaxle, 2. Remove the old rubber mounts, 3. Install the new rubber mounts 4. Install the new transaxle. Or, you could do it the way I did it: 1. Remove the old transaxle. 2. Install the new transaxle, 3. Drive the car for a couple of years until the old rubber mounts fail and the transaxle is flopping around trying to destroy itself and everything else at the back of the car, 4. Figure out a way to change the rubber mounts without removing the engine and transaxle, 5. Spend a couple of hours lying upside down under your car changing the mounts. I highly recommend the first method over the way I did it, but it's your call.


No comments:
Post a Comment