I had decided to use a dune buggy style wiring harness for this car for two reasons. The first and most important reason is that a dune buggy harness is cheap. A stock VW Beetle harness can run upwards of two hundred dollars, whereas a buggy harness is less than a third of that cost, around seventy dollars. The second and only slightly less important reason is that the buggy-style harness is simple. The stock harness has wires included for all kinds of things that I wasn't planning on including in the Baja Bug, like a clock, a stock turn signal set-up, a high and low headlight beam relay, an interior light, a radio, an ignition switch and a variety of other unneeded and unwanted amenities. I was only planning on needing wires for a bare minimum of necessary electric powered items.
What I consider necessary electrical items are headlights, tail lights, turn signals, engine electrical wires, a starter button, oil pressure sending unit, brake light switch, high/low beam headlight switch, windshield wiper motor and switch, dashboard instrument lighting, horn and horn button, and on and off switches for headlights, running lights and ignition. That's it. Like the dune buggy, I wanted this car to have a very simple wiring scheme and the buggy-style harness is perfect for that. If I need to add something to the car it will usually be at the front and it is very easy to add wires to that part of the harness after the rest of the car is finished.
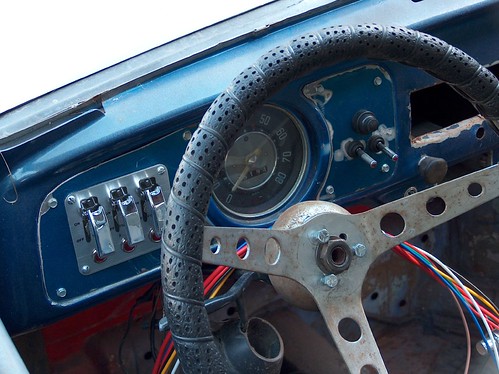
The only stock VW electrical parts I used were the fuse block, the turn signal switch, the windshield wiper switch, the dimmer switch, the ignition coil, the brake light switch and the oil pressure sending unit. Everything else came from the auto parts store, or from B.C.E. I used the buggy harness as a base and then added circuits as needed to get everything hooked up. I used the wiring diagram that came with the harness as a guide and supplemented that information with a diagram I found in an old hard-back Chilton manual that I paid too much for at a used book store. I wanted almost everything to be controlled with lighted toggle switches. I figured that using the toggle switches would be simpler to wire and would look cool on the dashboard. I was right. I later discovered that the switches made troubleshooting easier as well, in that it is very easy to see how all the circuits are connect by just looking at the back of the dashboard from inside the front trunk of the car.
There were a couple of areas where I had to fabricate a solution to a problem that arose because of the way I was building the car. At the front end, because of the one-piece fiberglass cowling, I had to find a way to suspend the wires supplying the headlights and turn signals so they wouldn't drag or the ground or pull loose as the car ran down the road. After driving it for while, I had to amend the design when one of three-prong headlight plugs pulled loose while Carol was driving the car. When the plug came loose, it shorted out the headlights, and, of course, it was nighttime when the problem manifested itself. Poor Carol had to sit and wait for me to come and get the lights working again before she could drive the car home. Once I figured out a way to anchor the wires at the headlights, that problem was solved.
The other alteration I did to the harness was to replace the keyed ignition switch with two toggle switches and a marine-grade started button. One of the weak points in the stock VW electrical system is the ignition switch. Eventually, when you turn the key, the ignition system will activate but the switch fails to activate the starter motor. When that happens you have to crawl under the car with a screwdriver and short across the solenoid terminals to get the starter to work. It's a pain, especially if you don't feel like crawling around in the street in your nice, clean clothes. The solution I use eliminates the ignition switch. Now, when something goes wrong, it is very easy to figure out which circuit is not working.
Finally, I put most of the wires inside of blue plastic tubing. Early on, I had decided that I wanted the color scheme of the car to be black, blue and white. Not only does the blue tubing look good, it keeps the wiring harness nice and neat with no loose, dangling wires.
Everything I did with this car was done with the idea that I wanted to simplify everything I could. At the end of the build I wanted a car that would be simple to work on and simple to diagnose. I also wanted the car to be reliable. I've found that simplicity leads to reliability, so that is the direction I usually go when I building my cars.


